Page 1 of 4
|
Page 1 of 4
|
How to make Walls, Floors, and Ground Cover (Beginning Creators Start Here!)
If you've never made anything for the game before, start here! Walls, floors, and groundcover are the easiest things to make, and a great introduction into editing textures, moving around files, and learning how to get a good result in the game. You also don't have to worry about your creations' compatability: all walls, floors, and groundcover are compatible with any EPs and just the base game, too. Plus, there's no meshes to worry about either! Yay!
Difficulty: Very easy! Requirements: Homecrafter, which will take the images you feed into it and make them into files which the game can use for walls, floors, and groundcover. It can be downloaded free from the official EA site (it does not come with the game). -and- Any graphics editing program capable of cropping, adjusting and tweaking colours, multiple layers, and a variety of brushes. This can be pretty much anything except MS Paint. You may already have a graphics editing program on your computer. Some common ones: Adobe Photoshop: The industry standard, and among the most powerful graphics editing programs you can have. This tutorial includes instructions on how to create walls, floors, and groundcovers using Photoshop. Photoshop CS2 will be used for demonstration, but these instructions should be fine for earlier versions, at least as far back as Photoshop 7. If you can't afford the newest Photoshop but you still really want to use Photoshop, try eBay for cheap copies ($40-50) of older versions. If you are not using Photoshop or Paint.NET but another program instead, you should still be able to use the instructions here, as most graphics programs should have all of the functions listed in some form. If you are using a different program, using the instructions for Photoshop will probably be your best bet. If you're having trouble figuring out the functions of your graphics program of choice, the best place to look is that program's help documents or their official site. I'll be explaining in basic terms where the tools I'm using are located, and offering screenshots of any filters or major steps, but this tutorial's difficulty level assumes you can install the programs yourself according to any instructions on the manufacturers' websites, open and close files, navigate to a given directory, and move files from one place to another. Menu commands will be written separated by - for submenus, i.e. if you should open the File menu and click Save, I'll tell you simply to File - Save. Though you'll be creating the three types of Homecrafter content separately, this tutorial is meant to be read in order (so you know what I'm talking about when I refer to something in subsequent steps), so start with the wall, then do the floor, then do the ground cover or you may be confused. Of course, if you're using Photoshop, you don't need to read the Paint.NET part of the tutorial, and vice-versa (they're just telling you how to do the same thing in different programs). |
Finding and Choosing Source Images
4 Attachment(s)
Tiling Textures
Just because you've found a nifty looking image doesn't mean it's necessarily going to work to make a texture. Unless an image has specifically been made to tile, when you put two sections of it next to each other (as you'll be doing for walls, floors, and groundcover), you'll see where each image meets the next as an obvious line, and it won't look very realistic. Finding a site that not only contains good images but actually has images that already tile is an exciting moment for a texture artist. Finding Textures This is probably the trickiest part of making walls and floors, and the best creators spend hours finding just the right textures to use for their work (when not creating them by hand). Learning to find great source images is almost as much of an art as creating things with them itself, but below is a list of some places to start.
Because of the "for beginners" nature of this tutorial, we'll only be covering the use of tiling textures for your walls. If you're fairly comfortable working in your graphics program of choice, you can make your own tiling textures... These two tutorials both basically cover the same thing, but have different techniques presented differently. Between the two you should be well-covered. Otherwise, start with some stuff from the Inspiration Gallery or other sites that have tiling textures. If you want to follow along exactly, the source images are attached to this post. |
Creating Walls, Floors, and Groundcover in Photoshop
This part of the tutorial is just if you're using Photoshop - if you're using Paint.NET, skip past this part to the Paint.NET instructions.
Wall Texture 1: Start by opening Photoshop. It should have a Start Menu shortcut under Programs, and possibly a Desktop or Quick Start icon, too. 2: Let's start by creating the right size image for a wall texture, so we have a canvas to work with. File - New (or CTRL-N) will bring up options for your new image.
 3: File - Open and open your source images. I've laid everything out so I can clearly see all my documents and everything I'm doing:  4: Switch to the document with the background image, and Image - Image Size.
 4: Now Select - All (or CTRL-A) and then Edit - Copy (or CTRL-C) from the background image. Then, switch over to the wall texture and Edit - Paste (or CTRL-V) to paste in your background image as a new layer.  5: Using the Move Tool, click on the pasted background and drag it into place at the top of the image. It should snap into place pretty easily. Then, Paste the background in again, and using the Move Tool, click on the new piece of background and drag it into place at the bottom of the image.  6: The texture as-is would work for a wallpaper, but it's a little bland. Let's add the border to the top. Switch over to the open document with the border and Image - Image Size again. Again, make sure Constrain Proportions is unchecked, and then change the width to '256' (the width of the wall texture). Because this is a rather tall border, I think it'll look better if we make it a little shorter, so I'll take it from 130 pixels down to 100. If it were a little shorter to begin with, I could just leave Constrain Proportions checked and change the width to 256, and let it make the height the right number to stay in proportion with the width change.  7: With the border document still selected, Select - All, then Edit - Copy. Switch over to the document with your texture and Edit - Paste. Use the Move Tool to click and drag the border to the top of the texture.  8. That looks a lot nicer, but let's do one more little thing to make this a bit more interesting. Switch back to the border, and using the Rectangular Marquee Tool, select just the bottom of the border. Edit - Copy that piece of the border.  9. Switch back to your texture, and Edit - Paste the little bottom bit of border into your texture document. Edit - Transform - Scale will bring up the scale controls for your layer. Change the height to -100%, so the layer you just pasted in will be flipped vertically (upside down).  10. Use the Move Tool to drag the piece of border to the bottom of your texture. Then Maximize the image by clicking the box on the upper right corner of the document window.
 11. File - Save As. If you don't already have one, make yourself a 'Sims 2 Projects' folder somewhere you can find it easily (in My Documents or on your Desktop are good places) with a subfolder for Walls. Save your document as a .psd - that way if we want to go back and make changes, shift some positioning, change the colours of a certain part, etc., we still have all the bits and pieces separated out in a Photoshop-format document. If you get a Maximize Compatability dialog, just click OK.  12. File - Save As (yes, again). This time, change the Format from .psd to .bmp. This will change the filename it wants to give it from 'YourProjectName.psd' to 'YourProjectName copy.bmp' so you need to change it so it reads 'YourProjectName.bmp' and then save to the same directory you saved your .psd document.  *** Edit: New information discovered June '06! You must first resize your walls to 256x512 before saving as a .bmp. Walls at 256x768 (or ANY other sizing except 256x512) will show as grey for Mac users, though they'll work fine for PC users. Please resize before saving so your walls work correctly for everyone. Floor Texture We're going to take a nice floor and change the colour so it matches the walls, and make it a little more carpet-like. 13. You'll want the finished wall texture and your source image for the floor both viewable, so you can compare them visually to each other. You should still have the wall texture open, so open your floor texture and arrange them something like shown.  14. With the floor image selected, Image - Adjust - Hue/Saturation. Fiddle with the settings in the Hue/Saturation dialog until you get something you like. There's really no trick to getting the settings on this just right; just keep playing with the sliders until you get something that looks right to you.  15. Filter - Noise - Add Noise. On the Add Noise dialog, make sure Monochromatic is checked, and then just play with the slider and the Uniform/Gaussian toggle until you get something that looks right. You want enough noise so that your pattern isn't crisp, like it's stenciled on, but you also don't want so much that you can't easily see the pattern.  16. Image - Image Size and change the width and height of the floor both to 256. Again, make sure Constrain Proportions is unchecked.  17. File - Save As and save your floor as a bitmap (.bmp) in a subfolder of the Sims 2 Projects folder you made called Floors. You can then close the floor texture. If it asks you to save, you can tell it no; there's nothing in that image (since we didn't use layers) that you don't have in the .bmp you just saved. Groundcover Texture 18. Because we're making ground cover, it doesn't have to match exactly to the wall texture, but if we were going to use them on the same lot, it might be nice for them to be similar in colour or tone, for a little more unity for the whole lot. So let's open the source for the ground cover, a nice craggy rock texture, and the wall texture we've created, and arrange them as before, so we can see both of them at the same time.  19. Image - Adjust - Hue/Saturation. Again, make sure Colorize is checked and adjust the sliders till it roughly matches the wall texture.  20. Select - All and Edit - Copy and then Edit - Paste to duplicate the image on a new layer, Layer 1. a. Click on the eye symbol next to Layer 1 in the Layers window (if you don't have a Layers window, bring it up by doing Window - Layers or by pressing F7 on your keyboard) to temporarily hide Layer 1.  21. Now let's combine the moss with the regular texture. a. Un-hide Layer 1 and click to select it. This will make all of our changes apply only to Layer 1, not the Background layer. b. Click the Eraser tool. c. Make sure all of your tool settings match those shown in the screenshot. d. Now use small single-clicks on the image to erase little bits of Layer 1. Don't get too close to any of the edges or you'll have an obvious line where two pieces of ground cover come together. Also, take care not to overdo it; we want a little bit of moss, not overgrown. You can always Edit - Undo if you make a mistake, or use Edit - Step Backward to undo several recent changes at once.  22. Image - Image Size to resize the ground texture. Constrain Proportions is still unchecked. The width and height will both be 256.  23. Now, File - Save As and save your document as a Photoshop Document (.psd) so you have the layers intact in case you would like to change or adjust something later. If it asks if you would like to Maximize Compatability, tell it Yes. 24. File - Save As again and change the Format to Bitmap (.bmp) to save a copy of your groundcover that can be read by Homecrafter. ----- Tutorials:How_to_make_Walls,_Floors_and_Ground_Coverwiki |
Creating Walls, Floors, and Groundcover in Paint.NET
This part of the tutorial is just if you're using Paint.NET - if you're using Photoshop, skip past this part to the Homecrafter section.
Wall Texture 1: Open Paint.NET. It should have a shortcut on your Desktop as well as under Start - Programs - Paint.NET and possibly a Quick Start icon as well. 2: Let's start by creating the right size image for a wall texture, so we have a canvas to work with. File - New (or CTRL-N) will bring up options for your new image. Make sure all of your settings are the same as shown, especially the size, 256 x 768.  3: Start another copy of Paint.NET (as it won't let you have two things open in the program at once... a bit of a limitation, but, hey, it's free) and open your background image.  4. We're going to want the background repeated once across each piece of wall, and twice down each piece of wall. Let's resize it so it fits. Image - Resize to bring up the resizing dialog box. a. In the dialog box, make sure Maintain aspect ratio is unchecked, so we can change the width and height independently, not relative to one another.  5. Because Paint.NET's resize kinda blurs images, let's sharpen it up a bit. Effects - Sharpen will bring up the sharpen filter dialog box. A value of 2 will return the image to about the same sharpness as before, perhaps a little more sharp, but since we'll be continuing to manipulate the image, a little extra sharpness can't hurt.  6. Now Edit - Select All (or CTRL-A) and then Edit - Copy (or CTRL-C) to copy your resized background image. Then, switch over to the blank wall texture. The Layers window should be at the bottom right of your screen; if it's not, you can bring it up in Windows - Layers or by pressing F7 on your keyboard. Click the New Layer button to give a new layer to work on and then Edit - Paste (or CTRL-V) to paste your background image into the new layer.  7. Click the Move tool so you can move the background image. Use the down arrow on your keyboard to move the new layer down to the bottom of the wall texture. You can hold down CTRL and press the down arrow key to move in larger increments, or just use the down arrow by itself to move it by a single pixel. a. Use the Zoom tool and click on the image to zoom in to get a closer look at the bottom of the image.  8. Right-click with the Zoom tool to zoom back out. Create a second new layer the same way you did the first, and then paste another copy of the background image into your wall texture document. This second one you shouldn't have to change the positioning of at all; it should be right at the top.  9. The texture as-is would work for a wallpaper, but it's a little bland. Let's add the border to the top. Switch back to the other open copy of Paint.NET (with your background image in it) and open the border image (you don't need to save changes to the background unless you want to for some reason). Again, make sure Maintain aspect ratio is unchecked, and then change the width to '256' (the width of the wall texture). Because this is a rather tall border, I think it'll look better if we make it a little shorter, so I'll take it from 130 pixels down to 100. If it were a little shorter to begin with, I could just leave Maintain aspect ratio checked and change the width to 256, and let it make the height the right number to stay in proportion with the width change.  10. Again, because of the resize it's a little fuzzy, so Effects - Sharpen again (or Repeat Sharpen should be at the top of the Effects menu). Edit - Select All and Edit - Copy to get ready to move the sharper resized border over to the wall texture.  11. Switch back to the wall texture image and create another new layer. Edit - Paste to paste the border into the wall texture. Niftily enough, it'll be right at the top. Isn't that convenient?   12. That looks a lot nicer, but let's do one more little thing to make this a bit more interesting. Switch back to open document with the border. Edit - Deselect to remove the previous selection. Using the Rectangle Select tool, draw a box from outside the image's bottom left corner up and to the right to select just the bottom part of the image as shown. If you mess up and grab too much or too little, Deselect and try again. Edit - Copy to copy the selected part of the border.  13. Switch back to the wall texture. Create another new layer and Edit - Paste to paste that little bit of border into the new layer. Layer - Flip - Vertical will flip the new pasted piece (it'll also pop it down near the bottom). Edit - Select All and then click the Move tool. Now use the arrow keys on your keyboard to move the piece of border to the very bottom. Remember, you can CTRL-down arrow to move in larger increments, and the Zoom tool to make sure you have the piece right at the very bottom.  14. Zoom out and take a look at your wall texture. Everything should be positioned just right. If it's not, select the layer the part is on that you want to change, then select the Move tool, and use the arrow keys on your keyboard to change its positioning (but if you followed the directions above, everything should be fine already). If you don't already have one, make yourself a 'Sims 2 Projects' folder somewhere you can find it easily (in My Documents or on your Desktop are good places) with a subfolder for Walls. File - Save As and save your image as the default type, .pdn. This will save the document as-is, with all of the layers intact, in case you want to go back and make changes later.  15. Then, File - Save As again and change the Save as type dropdown to Bitmap (BMP). Homecrafter will only import bitmaps, so this is what we want. Save your file as a bitmap, too, in that same Walls folder.  *** Edit: New information discovered June '06! You must first resize your walls to 256x512 before saving as a .bmp (and sharpen them too, in Paint.NET). Walls at 256x768 (or ANY other sizing except 256x512) will show as grey for Mac users, though they'll work fine for PC users. Please resize before saving so your walls work correctly for everyone. 16. When you get a message asking if you would like to flatten the image, say Yes.  Floor Texture We're going to take a nice floor and change the colour so it matches the walls, and make it a little more carpet-like. 17. You'll want the finished wall texture open in one Paint.NET window, and to have your source image for the floor in another, so you can see them both. If you just finished the wall part of this tutorial, you can use the still-open window with the border image to open your floor image; otherwise open both of them and arrange the windows as shown by un-maximizing them and pulling on their edges and corners. You may need to close some of the windows (like the layers and colours) to see everything.  18. Blue? That certainly doesn't match the wall. The goal is to make that floor a nice, low-saturation light yellow-brown. Layers - Adjustments - Sepia will give you this as a result:  19. Sepia's a lot closer, and evens out the difference in colours in different parts of the pattern (the original was a little more yellowish in places), but it's still too red. Layer - Adjustments - Hue/Saturation will allow you to adjust this more exactly. There's really no trick to getting the settings on this just right; just keep playing with the sliders until you get something that looks right to you.  20. Now that it's pretty close to the wall, you can maximize the window for the floor texture to have a little more area to work on. Image - Resize and change the width to 256 and the height to 256.  21. Again, the image is blurred by doing this, but in this case, that's okay, since we're going to make a carpet and the pattern wouldn't (and shouldn't) be very clear anyway. In fact, let's make it look more carpet-like. Effects - Add Noise. Turn the Color Noise slider down all the way to 0, and then play with the Intensity slider. You want enough noise so that your pattern isn't crisp, like it's stenciled on, but you also don't want so much that you can't easily see the pattern.  22. That looks nice! Let's save it. If you haven't already, make yourself a folder under your Sims 2 Projects folder called Floors. File - Save As and save your floor as a bitmap (.bmp) in the Floors folder. We don't have any separate layers to worry about, so we don't need to save it as a .pdn first, just a .bmp.  Groundcover Texture 23. Because we're making ground cover, it doesn't have to match exactly to the wall texture, but if we were going to use them on the same lot, it might be nice for them to be similar in colour or tone, for a little more unity for the whole lot. So let's open the source for the ground cover, a nice craggy rock texture, and the wall texture we've created, and arrange them as before, so we can see both of them at the same time.  24. Layer - Adjustments - Hue/Saturation. Play with the sliders until you get something nice that coordinates fairly well with the wall texture.  25. Then you can maximize the ground cover window as we won't be needing to compare it to the wall anymore. The result of the Hue/Saturation is nice, but it's a bit boring. Let's make the texture look like there are bits of moss clinging to the stone. Edit - Select All and Edit - Copy to copy the texture as-is. Click 'Add New Layer' on the Layers window and then Edit - Paste to paste the texture into this new layer. You'll now have two layers, both with the same texture on them.  26. Let's get a mossy background colour. a. Uncheck the box next to Layer 2 to temporarily hide the layer.  27. And now we'll combine the moss with the regular texture. a. Re-check the box next to Layer 2 to make it visible again.  28. Now we'll make the image the right size. Image - Resize and change the width and height both to 256.  29. File - Save As and save your document as a .pdn, so if you'd like to make any changes, you still have the layers separate. Save it in your Sims 2 Projects folder, under folder you'll create called Groundcovers 30. Image - Flatten will combine Layer 2 with the Background so all you have is one layer, the Background. Then Effects - Sharpen again to get rid of the blurriness caused by resizing.  31. File - Save As and save your image as a .bmp in your Sims 2 Projects/Groundcovers folder. |
Making Textures into Packages Using Homecrafter
Well, we've got all of our textures ready. Let's make them usable in the game.
1. Open Homecrafter. It should have a shortcut on your Desktop, or you can find it under Start - Programs - EA Games - The Sims 2 Homecrafter Plus. If you have a lot of custom content in your game, it might take a few minutes to load, so be patient. 2. Homecrafter creates the folders it will look in for the content you're creating the first time it's run. Once it's running, we'll go ahead and copy over those files. Open up a regular Windows Explorer (folder view) window to move the files around on your hard drive. You may want to do this in two windows, one for the source directory (the one you're copying from and one for the destination (the one you're pasting to), to make it easier. a. Open up your Sims 2 Projects/Walls folder. Copy your wall texture .bmp file. Navigate to My Documents/EA Games/The Sims 2/Projects/HomeCrafter Plus/Walls and paste the .bmp file into that folder. You'll then have two files in that folder - the one you just put there, and Template.bmp. Making the Wall 3. When Homecrafter is fully loaded, you'll have three choices. We'll start with the walls, so click Create Wall Covering.  3. Then click the big blue plus symbol to Create New Content.  4. Select the name of your texture in the list (it shouldn't be hard, there's only two).  5. Now we get to choose all the options for the wall texture. a. First, make up an interesting name for your wall texture. Give it a price, too. Most walls will probably fall in the 1-10 range, perhaps as high as 20 for a very fancy wall.  6. Now you'll be back to this screen. a. Verify that the wall you just created shows up in the catalog. It's usually the first item in the list.  Making the Floor 7. The floor screen looks rather like the wall screen, doesn't it? Remember the big blue plus (+) to Create New Content? This screen has one too. Click it.  8. Then choose the floor texture you made.  9. Now you get to choose all the options for your floor. a. First, make up an interesting name for your floor texture. Give it a price, too. Most floors will probably fall in the 1-15 range, perhaps as high as 25 for a very fancy floor.  10. That'll bring you back to this screen. a. Verify that the floor you just created shows up in the catalog. It's usually the first item in the list.  Making the Groundcover 11. Again, start by clicking the big blue plus (+) button to Create New Content.  12. Select the groundcover texture you created.  13. Now, choose the settings for your groundcover. A little simpler than before, eh? a. First, make up an interesting name for your groundcover. You don't need to enter a price (nor would it let you if you tried).  14. Your new groundcover should show up in the catalog, usually as the first entry. Click on the little door at the bottom to exit Homecrafter.  Congratulations! You just made a wall, a floor, and a groundcover! Notes on Homecrafter
|
What Now?
Testing Your Creations In-Game
Go ahead and load the game and go into your neighborhood of choice. Create yourself an empty lot to use for testing. I think I used a 2x2, but it doesn't really matter what size you use.  Enter the lot and put down some walls. Again, doesn't really matter where... Just make sure you're looking at the light side of the wall. The light on the lot comes from a certain direction, and if you're not looking at the correct side, the wall will look much darker and you won't be able to see your texture as well. Put down two or three sides of a box, like you're making a square room, and wallpaper the walls with your new wallpaper. It may not be the first thing in the catalog now, even if you have no other custom walls in your game. Cover the area of ground between the walls you made with your carpeting. Now take a look at your handiwork! I was actually a little surprised when I saw these together... the background of the walls seems a lot warmer than the more yellow border and floor, but after looking at it for a minute, I kinda liked it better than if I'd done it the uniform yellowish-beige I'd intended the whole thing to be, and eyeballed in the graphics programs I'd built it in. The background being warmer is a little more interesting.  Somewhere on another part of the lot (you can get rid of the walls and floor if you need more space), use the raise terrain tool on the smallest setting and just... click randomly around a small area to make some craggy, uneven terrain. Then go in to the groundcovers and, still on the smallest setting, just lightly dust the tops of the rises in the terrain you just made with your new groundcover. Rotate around and tweak it to taste. The screenshot below is just some quick craggy terrain I threw together, the groundcover just assembled, a couple clicks with the water tool, and a couple trees. The larger areas of green are just the default green grass that I left here and there in the low spots.  If you don't like the result in-game... You can go back and make changes! Remember, for anything with layers, you should've saved a layer-separated version... a .PSD if you're using Photoshop, or a .PDN if you're using Paint.NET. You can go back, open the file, and edit it to your liking. Save a new copy of the .bmp version, move it into the right Homecrafter folder, and make a new version of it. Where are my creations located? If you'd like to share your new creations (or if you'd like to delete an older version if you've made changes), you'll find the files you made residing in My Documents/EA Games/The Sims 2/Downloads. Unfortunately, Homecrafter doesn't make the file names very descriptive, beyond wall_, floor_, and terrainPaint_, ending with a string of characters, but since we only made three at once, it's pretty obvious which file is which. If you're doing more than a few at once, write down the order you made them in, and then sort the newly created files by Date Created... You can then rename the files in the same order as the order you created them in, and it should all match up. You can also open the files in SimPE and look at the Text List inside it to see which is which as long as their names or descriptions you gave them are different, but that's for more advanced users (i.e. anyone who knows what I'm talking about with that one sentence of instructions). Rename your files to something much more descriptive. For example, I would name a floor I created: F_Carpet-ImperialEggshell_HystericalParoxysm-DemusedSims.package You don't necessarily have to get that specific, but it is VERY helpful, both as a creator and a downloader, to be able to tell what a file is and how to track down the creator at a glance.  Sharing Your Creations If you've created a particularly nice set of walls, floors, or groundcovers that you would like to share with the community, that's great! A great help to beginning creators is the Creator Feedback Forum here at MTS2. There you can post pictures of your works in progress and get pointers from experienced creators and downloaders on how to improve. It's a great way to get lots of helpful tips and info, and it's strongly suggested that beginners make use of that forum before uploading. Just make sure you read the rules for that forum first. Once you've decided your creations are ready to be released to the world, check out the Creator Guidelines for info on what you'll need to upload your walls, floors, or ground covers, and RAR or ZIP your .package files. A guide to things you can do to take better screenshots is available here. It is strongly recommended that you take screenshots for your creations by using the Print Screen key on your keyboard to put a copy of your current screen on the clipboard. Then you can paste the image into Photoshop, Paint.NET, or even MS Paint to crop it and save it as a JPEG. This method is greatly preferrable to using the C key to take pictures using the game's camera, which tends to take much smaller pictures with a lot of JPEG compression (crunchiness). If you're not running in windowed mode, it can be hard to switch programs, so if you'd like to set that up, it's very easily done by these instructions. What to make after walls, floors, and groundcover? Starting with walls and floors gets you used to texturing on the game's scale and looking for seamlessness in your textures, without having to worry about your texture being stretched or distorted over a mesh. Once you've become very skilled and confident in creating walls and floors, and have done a lot more to make interesting effects than the very simple techniques shown here, you may be ready to move on to something more. If you're pretty good with computers and don't mind something a little more complicated, you can graduate from walls, floors, and groundcover to doing simple object recolours like paintings and furniture. Alternately, as it doesn't require the use of SimPE, recolouring clothing in Body Shop is relatively easy, and very well explained starting with the first in a series of great tutorials on the subject. If you have questions or are having trouble... First, go back and re-read everything very carefully and look at the screenshots. 90% of problems are usually due to having missed a step, done something incorrectly, or trying to skip ahead. If you're truly an absolute beginner, it's highly suggested that you do the tutorial using the same source images I did, so every step you do will be exactly the same, and so you can compare your work to my screenshots. If you're having trouble with something in the graphics program you're using, try its help file. Most graphics programs also have forums on their official sites full of useful information. If you're still having trouble, you can ask your question here. Please make sure you include what -exactly- you are stuck on (what step of what part) and what program you're using. Screenshots are also helpful, if applicable to your problem. "I don't get it," is a question that can't be answered, and won't help anyone, especially you. Ask a specific question about a specific problem after going through the whole tutorial carefully. |
Thank you, Thank you
The tutorial is great. I was having so much trouble with walls and floors before doing them with your tutorial. I am not an expert now but have a much better idea of what I am doing.
:D |
Attachments to Download?
Where are the textures to download?
 |
kbresh, I'm assuming you mean the textures I used to create the walls and floors? They're attached to the second post in this thread, and should show up under "Screenshots" right under where it says "If you want to follow along exactly, the source images are attached to this post." Try reloading the page and waiting for it to load completely (as this is a very image-intensive page with all the screenshots) if you don't see them there.
|
For some reason, I don't have Homecrafter. Is there any reason why, or any way I could get it?
|
You have to download Homecrafter from the official site, it's not included in the game. HP has a link in the first post of this thread to download it.
|
Thank you so much for this great tutorial. I've been playing the Sims 2 since January and have been coming here for all the awesome downloads shortly after that. Two days ago I began playing with this tutorial, and now I'm having a blast making my own walls and floors. I even got brave and tried another tutorial - and -WOW - now I'm doing bedding, too!
I'll get better, then start sharing here. It will be nice to give back to a site that has given me so much. Thanks again! |
I have downloaded the tutorial but it does not cover what I would like to do.
I do not know if what i am about to ask is permitted, so please tell me if it is not. I would like to change some of the walls that I have downloaded to my game. For example make the top half of a log cabin wall into wall paper using the top section of a different wall. Both walls do show in Home Crafter. Is this possible if so is there a tutorial to help me do so. Thanks |
If they're custom wallpapers (user-created) that you've downloaded, you can edit them, but you cannot redistribute them without permission from the original creator. But if you're just doing it for your own personal use and you never share those without permission, sure, that's totally doable.
Go into Homecrafter, and find the first wall of the two you want to use. Select it, and next to the big blue + button to make new content, you'll see two smaller buttons - Edit selected content, and Clone selected content. Choose Clone. That'll take you to the main wall editing screen. Look below where it displays the wall with the gridlines and you'll see it says "Texture to Edit:" - It'll display a directory and filename of the .bmp it has created down there. Open that directory, and open that file in your graphics editor. In Homecrafter, click the X beside the "Import to Game" button to cancel that project. Then go find the other wall you want to use and do the same thing - clone selected content, look at the directory and filename it's using for it, and open that in your graphics editing program, too. If you're using Paint.NET you'll need to open it in a second instance of the program. Then just copy the parts from one that you want to use over onto the other - like how I showed copying the little bottom piece of border in the tutorial. Once you have your new image with both parts adjusted, you can create a NEW project (+) and save your new wall with both parts into the same directory as I showed in the tutorial. |
this tute rocks HP! big thanks and a compliment to you!
|
Thanks so much for this!! I'm so happy you have so many taturials using Paint.net. on the site. This one is amazing! You made it very easy to understand and helped me to get even more familiar with how to use the program. I'm off the make walls for the rest of the night!! Thanks so much for enhancing my simming passion!
|
Thank you HystericalParoxysm for the information concerning the custom wall and floors. The new floors and walls I create will be for my own use.
Thanks also for the Tutorial. I am creating with out problems now. |
Thank you for this extensive and very comprehensible tutorial.
Tough, you don't mention anything about bump map, I'm quite sure there must be a way to add one to a wall. Do you have any infos about it ? or a link ? Thanks again anyway. |
The inspiration gallery link doesn't work. I did a search for it and it's: http://www.theinspirationgallery.com/ I'm working on your tutorial now. I know how to make wallpaper and have done so but am hoping for a more detailed approach so that my wallpaper looks the best it possibly can be. Thanks for sharing it!
|
Quote:
Ha ha, you nailed me there. I was just thinking how cool my red and white hearts would look in a little girls room when I read this. We'll have to see if mine turns out ok... |
Thank you!
Thank you very very much! It's very easy to use and I did my first recolor!!! :lovestruc
  |
what happens if you accidently delete the template?
|
Um, no idea, orangerevolt. I doubt it makes a whole lot of difference one way or the other. You really don't need the template - it's just there to tell you the finished size you need. If you did delete it and things are asploding because of it, try restoring it from your Recycle Bin, or if you've gotten rid of it from there, reinstall Homecrafter?
|
Hi,
I want to thank you for adding the bit about wall textures needing to be exact size of the homecrafter template in order for them to show correctly in the Mac version of the game. I wanted add that the same is true of floors - they must follow the default sizes or the too will show up as gray. |
dude the inspiration gallery link dont work i have tried googleing it, and using the links on this page but it always comes up with 'cannot find server.' any ideas?
|
I have no idea why that is, amy9301, but I get the same thing... even if I don't try to follow the link and just type it in, I get that... Googling it comes up, I can get to it through there, and then the links on this page and typing in work fine. They've got to have some weird referring links strangeness settings on their server, or sunspots, or swamp gas, or something.
|
Great tut
However, I'm having difficulty making plain paint walls. I've tried various noise filters to the walls, but they aren't showing in-game the proper color. I've searched the forums but can't find anything relevant. Perhaps I'm not using the right search terms.. I don't have a Mac, I've saved the images both at the 768 and 512 heights, doesn't make a difference. I've checked when the walls are in actual rooms, not just on a lone wall, and though they seem 'right' in a full room, the colors are still off. Suggestions? What can I do or how can I alter the way the file saves to improve color quality in-game?? |
ladylarke, I think a lot of that depends on your monitor settings, your graphics program settings, your eye for colour, the colour of the light in the room you put the walls in, the time of day in game, and a number of other factors... but I do know what you mean. My recent set of Victorian wallpapers I uploaded, they look like a really aged yellow on my texture, and in the game they're sort of... greyish beige. It seems like it desaturates some... maybe by like 5%... I think if you add a little saturation right before saving with each one, you should be able to get a little closer to your intended colour. You may have to play with it a little bit to get the exact mixture and feel for it right.
|
I used photoshop my walls came out great but my floor and groundcover had white lines running through, I guess space inbetween the tiles. Do you know what i did. This tutorial was helpful and I would like to make more floors and groundcoverings but I need to no what I did wrong. Thanks in advamce.
|
jdbRISTOWE, that does sound like what happened... spaces in between your tiles. Make sure you are using tiling textures like from the Inspiration Gallery, resize your images so you're sure they're the right size, and if you're putting several tiles together, I'm not sure but the "snap into place" thing in Photoshop may be a feature of later versions (CS/CS2). If it is and your image pieces don't seem to snap right into place, you can uncheck "show transform controls" so you can see all your edges, maximize the image, and zoom in. Use the arrow keys on your keyboard to nudge the image exactly into place, paying attention around the edges for any white space.
|
thank-you HystericalParoxysm your tutorial was very helpful and your instructions on how to fix my problem were very accurate and I had it fixed within seconds once again thank- you for all your help
|
Thanks so much for this! I've finnaly found something i'm good at! (Except for re-colouring clothes...)
|
Nice tut! Very helpful
|
My thanks too. I definately needed a "for dummies" guide, but the well-structured layout let me jump over bits I didn't need - something which, unfortunately, a lot of people don't take into account when writing instructions. I am horribly afraid of the creations I might now unleash upon my unsuspecting Sims...
In the interests of clarity (and because I am a pedant and you may quote me on that!) - right at the end of your tute you mention you don't know why the HomeCrafter template prompts you to save walls in 256x512 format. Obviously you've since answered that one (ie for Macs as you edited to include earlier) and I just thought it might be good to update that bit too. And now I'm beginning to wish I'd never started this, I do sound like I'm having a whine! My main point is to say thanks, so thanks! |
D'oh, you're right, ingaus. That bit of info on the template sizing came up after the tutorial was complete, and I sometimes forget to edit little bits out. Thank you.
|
No worries HP, always glad to make my tiny contribution... :D
|
i have coral paint shop pro and none of the buttons and stuff are the same and i have to things to say:
1. This is really complicated and i was wondering if maybe you could explain to me how to do it in coral paint shop pro X? 2. i dont mean to say your work is bad its really good. 3. please help me! |
I have photoshop 7, but when i try to save the file as a .bmp there is no selection for it in the dropdown menu. Is there any way i can make it appear there?
|
Is there an option for Windows or OS/2 Bitmap? That should be the same thing as BMP.
|
shelldevil, I have photoshop 7 and BMP is like the second choice on the list. That's a bit puzzling.
|
Thank you for this wonderful tutorial
|
Thanks way much now im cool
|
Thanks for this tutorial, but i made something following every single step and it looked good on homecrafter and everything, but when i zoomed in in the game it was all pixely. is that just my graphics settings or what?
|
Yeah your tutorial is just wondeful !!!!!!!!!!!! I was just 0 in all this things to create such as walls - but now ,well.... i understand it !
|
tomasz25, sorry for the slow reply, didn't see your message till now - if you save your images at the default size, if you're zoomed all the way in, even if you have your graphics settings to the highest level, you'll see some pixellation. After all, the wall texture you're using is 512 pixels high - and the game is stretching that texture over a wall that, when zoomed in, is quite a bit taller than 512 pixels in the game. Now, if you've got your texture detail settings set lower, then everything is going to look pixellated like that, your wall texture, Maxis walls, other custom walls, and everything else in game. If that's the case, turn your graphics settings up.
If it's just a matter of it being pixellated when you've got your nose up against the wall, so to speak, you can either not worry about that (as Maxis walls are going to be like that too), or you can use a larger graphic when you save the image. Using graphics at 256x768 gives you an image at the actual aspect ratio the game uses (which is why I show you how to build your graphics at that resolution, so they look right) but if you save at any other size than 256x768 your walls simply won't work for Mac users. You should probably try to be as compatible as possible, but if there's a particular wall you really want to be nice and sharp and crisply detailed, well, just make sure you note that it won't work for Mac users somewhere big and bold if you upload it anywhere. I did that on my Victorian Advertising Wallpapers because I really wanted the images to be readable in the game as that's the charm of that sort of wallpaper, so I built it at... erm, double 256x768... 512x1536. This is normally REALLY not necessary for walls, but for something very special like that, where I had a really specific goal in mind (readability of some of the larger text and headlines) it's okay, and I tried to make it very prominent letting Mac users know it won't work. Hope this has clarified that some for you. |
help
i followed every step but when i tryed to save it didnt have the .bmp choice only the psd one. I'm using photoshop 5.5 is there anyway to get the .bmp one on it? :S
Please help! |
I really want to thank you also, HP, for a wonderful tutorial. For the first time since I discovered The Sims in 2002, I feel like there might actually be *something* I can finally create for my game. Your tutorial was packed full of step-by-cohesive-step information, leaving nothing out, including your own patience. I wish others who write tutorials would write them that well! Someone suggested a book for Dummies. Would you consider writing a Sims 1 & 2 Creating ALL Custom Content for Dummies book in the future? LOL Can't wait to try all this out!
|
Extremly good
Thank you very much!
 You are the king. You are the king. |
Okay, sorry for my slow reply. I tried your suggesetions and things are working better. I assumed that the size you stated was the only one that worked. I didn't want to reply until I tried lots of different possibilities. I also tried different thing with floors, and a floor set that I made got accepted to the site a few days ago. Without your wonderful tutorial, it would not be possible. Thank you. The set that I am talking about can be found here:
http://www.modthesims2.com/showthread.php?t=196221 |
I've made some decent floors and walls and found both this and Faylen's texture tutorial very helpful, however, I wonder if I am trying to do the impossible. I have some images from TheFatStrawberry and also some photos of my own that I want to use for walls and carpet. The problem is, there seems to be no way to keep them from showing obvious seams. I was able to successfully make some by choosing a spot in the pic where there was less detail but that wasn't the effect I was after. Am I trying to do something that simply can't be done? Are there certain patterns or heavily textured images that can't be used without the seams showing? Or is there an advanced magic trick that I am not aware of? thank you.
|
Any tips on making Wallaper Murals, or is it pretty much a hit and miss till you get aligned righ? Please help...
|
tomasz25 - I like your set, especially the black and white squares. Good job!
obsessisim - Well, getting a seamless texture out of a non-seamless pic has vexed texture artists since the beginning of the pixel. One thing you can do with very soft pics (like clouds) is, in Photoshop, use Filter - Other - Offset and change the horizontal offset (for walls - for floors you would do both horizontal and vertical). This will immediately show you where the seam is, and then you can use a soft fuzzy brush to paint (or clone stamp) to fix the seam, then offset again to put it back (if you want - shouldn't really be necessary but I do it). I found a little tutorial, not specifically for Photoshop, but showing this technique here: http://www.highpoly3d.com/writer/tu...le/seamless.htm A google search for "making seamless textures" or "making textures seamless" seems to bring up quite a bit of good info on it. Unfortunately there's no one trick... plenty of programs that claim to do it but make ugly stuff, and a lot of skill and practice involved. Eventually, after working with textures for a while, you'll be able to glance at a pic and go, "Oh yeah, that could easily be made seamless" or "that's gonna be a total pain, nevermind, I'll choose something else." Ebbe - I've done it in Photoshop with great success by using Guides. You'll need to get the pic set up so that the height and width are correct - the height should be 768, and the width should be a multiple of 256. You may need to crop or resize to stretch it a bit one way or the other. Then use View - New Guide to add guides to your pic. If you want three tiles across, then you'd add a vertical guide at 33% and 66%, to divide the image into thirds. Make sure Snap is on (View - Snap) and then use the rectangle select tool to select the left third - your selection will automatically snap to the guide so you get a perfect seam with no effort. Copy it, paste it into a new document, resize to 256x512 and save as your first wall piece. Go back to your big texture, select the right third, copy, paste into a new document, resize, and save that as your third wall piece. Then set your selection to additive and select both the left and right thirds, so you have everything but the middle selected, and Invert Selection to have just the middle piece selected. Again, copy, paste into a new document, save, and save as your second wall piece. Then make the three walls in Homecrafter. If you notice a seam between the wall textures, try setting the background colour in your new documents for each piece to a colour that more closely matches the general colour of your textures - i.e. if your textures are mostly red and orange, choose a reddish-orange background colour instead of white. |
HP thank you for your response. I finally had a eureka moment and realized the textures I was trying to use were just too, well, textured. So I used render-clouds, no pun intended. It worked, it wasn't exactly what I had been after originally of course, but it looks really pretty. I'm going to try the offset procedure next. Thanks again.
|
:/
im also having the same problem as shell and alana,im usuing photoshop 7 although when i finish creating there is no option to save as a bmp, can anyone help me with this?
 |
one suggestion i have is to save it as a .jpg and then opening your new .jpg file with microsoft photo editor, then pressing save as, and then selecting the bmp option
|
Very nice tutorial. I've never custom made anything for the game until now!
I have one question though. I made a specific wall for the outside of a shop I'm building. Problem is.. there is a sign that is about as wide as a wall. I don't know how I would make a sign individually at that width and all but, I figured that I could add it into the wall that I made. Problem is.. the sign shows up 3 times in the final product and I don't want that. Is there anyway I can incorporate a sign that says "The Dot Grill ect."or would I have to make that seperate from the wall itself? Thanks again and great tut. Jolene |
If I hadn't read this, it would've taken me forever to figure out. Great tutorial! And its given me something new to do on sims! XD
Thanks! |
thanx a lot
|
thanks for this tutorial, now i'm addicted to www.theinspirationgallery.com and am totally inspired by you. thanks! i'm trying this when i get home.... this friday! that's 4 days away!!!!!!
 |
OMGISH! Thank you SO much for this. I just made my first recolour (*squeel*) And it looks... normal! Thank you once again, so much for this wonderful tutorial.
|
Thanks a lot, your tutorial is really good, and I'm actually beginning to understand the very basics.
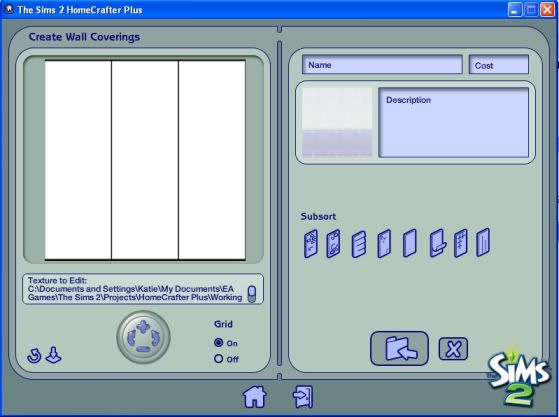
 But I have a problem with the wall. I put the size as you said, everything looks good, but when I opened it in the Homecrafter, I see the wall, and then two black spaces on the sides, as if the wall I just created was too narrow for the template. I tried several times and with different sizes, such as 256 x 768 and 256 x 512, but they all look the same. I also exported one of the Maxis wall and opened it with Photoshop, so that I could compare mine with Maxis, and so far I can't notice any difference. I can't understand why I see those black spaces. What do you think the problem is? I'm trying to google it, but so far I haven't come up with any solution. Thanks again! |
Melynna: Those black spaces are just gridlines. There is a grid option, and its defaulted to start with having them on, so just click on the off box
 |
Saving/Showing up Problem
I did everything as you said, with saving the files, but it still fails to show on the New Content Window. When I looked at the files, I could see the Wall I just made has a photoshop logo next to it. So as a test run I cloned another wall that was already in the game to see if it had some different logo, and when I looked at it, it had the Microsoft Office Picture Manager logo next to it.
I became confused, and tryed to paste the wall I had just made to the cloned wall, and saved it. I had trouble getting it to save as the same template, but when I did get it to save correctly, it failed to show on the HomeCrafter. So I went into My Documents, and opened the photoshop file with Micosoft Office Picture, and it did the funniest thing. It showed up as the original cloned wall, and had none of the changes I made to it. I'm lost as to what to try next to fix this problem. I don't have a mac, and the picture is the correct size... what's the problem? |
Thank you for taking the time to post this tutoirial.. it was a great help and helped me create my first wallpaper
|
I'm having troubles.. I use Jasc Paint Shop Pro 9, I made a wallpaper and saved it as a .bmp. I did it twice, once using Paint Shop, and another time with MS Paint. (both different filenames, both ending with .bmp) and when I open them on HomeCrafter, I see it on the right, but not on the left. (Check the screenshot) This happens for both of the files. What can I do?
 |
Ok, I've been making walls and floors since I first got my hands on homecrafter so I'm not unfamiliar with the process. What I am unfamiliar with is the photo editing software. While I wait for a new Photoshop disk (discovered a 1" crack in mine this morning
 ) I'm using Paint Shop Pro X. What I want to do is change the color of the Maxis siding Applause! All Natural Clapboard to a variety of colors to upload here for builders to use to cover up wonky walls. I have a set, but the creator doesn't allow her recolors to be uploaded with lots anywhere other than the site I got them from. So, now that I've removed hers from my game I need to make a set of my own! ) I'm using Paint Shop Pro X. What I want to do is change the color of the Maxis siding Applause! All Natural Clapboard to a variety of colors to upload here for builders to use to cover up wonky walls. I have a set, but the creator doesn't allow her recolors to be uploaded with lots anywhere other than the site I got them from. So, now that I've removed hers from my game I need to make a set of my own!I've been using bucketfill on the background layer with opacity at 50% and I don't like the results I'm getting. It looks a bit "washed out" for lack of a better term. And when I adjust the opacity I'm not getting a dark enough result. This is the only method I've found through my own research including two books I bought. (other than just adjusting the hue and saturation which doesn't give me as much control as I'm looking for... I have the values for some specific colors I want to use but I can't figure out where to plug them in to adjust it without completely losing the texture of the original wall ie I'm just getting a big rectangle of color rather than a recolored maxis wall texture) Clearly I'm not looking in the right places or using the proper terminology when I'm searching the net. Is there another technique I should be using? Gee, I never imagined I'd be asking this question for walls when it's also the only thing preventing me from recoloring objects as well. Please give me a kick or shove in the right direction if this isn't the place to ask. I'll gladly take my questions to the appropriate place and still share my results here. Thank you |
JLonier: um...i hope i understood u correctly JLonier. fistly, create another layer that is just one solid colour, or pattern that u want the wall to end up looking like. then, set the layer with you're textured wall above the sold colour one, and then set the textured layer to luminosity. I have photoshop, so im not sure if with Paint Shop Pro, the thing is called luminocity, but what it basically does is that by setting it to luminosity, it takes on the colour of the layer behind it, thus changing it to the colour u want without distorting your texture. hope this helps....
CrimsonWish: if you see a photoshop logo, that means your picture file is set as a .psd or whatever the photoshop file name is. in photoshop, u have to save as a .bmp or if by some chance it doesn't let you (it may not for some people with low ram, etc) save it as a .jpg after you do this, open your new.jpg file with microsoft photo editor, then press save as, and then selecting the bmp option. hope this helps... |
1 Attachment(s)
tomasz25, thank you for responding. I tried as you suggested (it's called luminance in paint shop) and after fudgeting around a bit it worked! However, the color I've ended up with doesn't match the values I've got it at. I'm not understanding, but I'm further on my way than I was earlier this evening. I'll keep at it. Thanks again.
I've messed about a bit more and am not understanding why it's coming out so bright. I'm not sure if you can tell from the screenshot, but the color I want is a nice, rich, deep, dark, victorian red. The color I'm getting (putting my texture on top and setting it to luminance) is more of a neon circus color even though you can plainly see the layer below it isn't that color. Can you tell what I'm doing wrong? At this point I probably need to put it away for the night and pick it up again tomorrow. Now that you've given me another way to try I will do some more searching in the morning and we'll see. Learning like this can be so frustrating! But you also never forget it. |
okay, well i don't think this will get you exactly what you want, but get it a bit better. on your textured layer, turn saturation all the way down. Turn lightness, or brightness, or whatever paint shop calls it down just a touch. also, change your red layer slightly darker.
|
I guess nobody could help me with my problem...? |
katatem17: i really don't know why that's happening, sorry
|
Quote: Originally posted by tomasz25
its alright... I'll try to think of something...  thanks anyway, tomasz25... I wonder if it'll show up on the game if I just import it without looking at it that way... I think I'll try that. |
tomasz25, Nah that didn't do it. However! I played around a bit more this morning and got close enough to the values I want that I will be submitting my wall recolors some time today. There must be a way to recolor using exactly the color you want. Maybe it's just not possible in paintshop? I dunno. Since my PSE disk was ruined I decided to upgrade to PSE 5 (reasonably enough my hubby won't let me get the full version until I'm experienced enough with the software to mesh) which will be here (according to Amazon) on Tuesday. I think I know where to go in PSE to do what I've been trying to in paintshop.
Anyway, thank you for your help. |
Can't you save it directly in the mydocuments/EA games/projects/HomeCrafter Plus/walls or w/e. instead of copying and pasting from your folder into it?
It would be easier + when you modify if (IF you modify it) then when you clicked save it'd save and you could press refresh before uploading it to the game. |
Thank You
HP, thanks alot for taking the time to write this tutorial. It is a huge help for us beginners. I really appreciate all the hard work you put into this. It has been a huge help.
|
F.usic - You could do that, yes, but the refresh button only works when cloning or modifying projects. It doesn't work on new projects.
|
This is a very nice and complete step-by-step tutorial. It must have taken you a lot of time to write and put together. Nice work, really. I will try it soon. Thanks a lot.
|
Very nice tut. I just did it now, and I feel good with myself.
*Hands HP a cookie* |
1 Attachment(s)
Firstly: thank you for making pedagogic tutorials with a sense of humor so they aren't boring to read
Secondly, my problem: I've made a wall paper that I'm quite happy with (the first thing I would like to upload...). I have made it with HomeCrafter and I hope that I did everything right. Shame on me, I didn't follow a tutorial for this. But I can't upload it, because it's a Sims2Pack file. How do I make this a .zip or .rar file? Is it even possible? I suppose I'll have to redo everything just because I was so ignorant. Blah. I downloaded CEP today but this wallpaper doesn't require it.. or does it? I used one of Maxis wallpapers (like you can do in HomeCrafter) so I assume not, but I'm not sure.. and I have Pets, people without Pets can still use it, can't they? I'll attach a picture of the wall paper as well if you're interested, critizism is always welcome. (Credits: chair by muranomobilia.com, part of Mono Kitchen set; floor by sims24ever.de, part of Fine Bathroom set) |
Horrible green tiles
I followed yout Tute to the letter, I even went on and made some other walls and floors in photoshop, as I found it fun and easy to do. I put them into homecrafter and all was fantastic, with all floors, walls and groundcovers.
My problem arose when I opened up my game and tried to test my creations. All the walls were fantastic, Ground cover was great, but the floor tiles came up green. Texture was obviously there, but they were all in a really bright green colour. I went over the Tutorial again and cannot see where I went wrong, I even tried searching for answers through the replies and forums but couldnt find anything. Does anyone know where I went wrong?  |
Where can you find cool ideas for walls? I need a purple theme or something...just a website for real wall/floor house recoloring stuff. This way you can use colors similar and get that theme for the game..
|
Thank You!
I loved this tutorial! I've never made anything for the sims2 before, but now I've got a better idea of how to go about making stuff. Thank you for getting me started.
|
Quote: Originally posted by littlejohnnyhoward
I have searched High and Low for an answer to my dilemma and The Sims2 BBS came to the rescue. Another Simmer had a similar issue (though their floors turned pink/purple) and someone suggested to them that they remove the Transparent tiles from their CC, which fixed their problem. I went and disabled the transparent tiles from my CC and went back to the game only to find that my floors were still green, so I went back to Homecrafter and re-imported them into the game and that seems to have fixed my problem, my tiles and carpet look fantastic. I must also thank HP for the fantastic Tutorial (I forgot to do it in my first post) I am off to find more textures to make my Sims' homes the pillar of fashion! :D |
vicke: you put the sims2 pack file into a .zip or .rar
|
Home Crafter Problem--
Hi,
If this was posted elsewhere I didn't see it. So, I will apologize ahead of time. I have made my pictures into BMP's-- I can see them in the Home Crafter-- but the minute I turn on my grid-- Home Crafter crashes!!!Every time!! Is it compatible with Sims2 base- and EP through OFB? I don't know what else to do--I've uninstalled it-- defraged-- and reinstalled-- and yep it crashed again...... Ok? HELP!!!!! I'm pulling my hair out!!!!!!! I really want to try and do this-- but can't get past this problem.... Thanks guys-- if anybody can figure this out -- you guys can! I appreciate your help ButterflyIII2006 |
butterflyiii2006, have you downloaded the latest version of Homecrafter? It was updated some time ago.
|
Quote: Originally posted by tomasz25
But... how? :D |
Quote: Originally posted by Vicke
Right click on the file you want to rar and a menu with a list of options will come up. Select add to archive. |
Question about creating my own wall/floor textures
This may be more of a photoshop question and if I should put it elsewhere please poke me in the right direction.
In an efffort to learn photoshop (with an eager eye to recoloring 'cause I'm gettin' bored with walls and floors) I've started playing around with making my own wall/floor textures. I've made a nice plain brown four square tile that tiles seamlessly as a wall and a floor in photoshop. Problem is when I import it into homecrafter it turns into one big brown wall instead of my nice little four square brown tiles at the bottom of the wall. Here's what I did. I made a 256x512 file. Then I opened a new file and made it 256x256. I bucket filled it with a nice shade of brown. Then I drew a white stripe down the center, through the middle, and around the outside edge for my grout. I offset it and made some adjustments then saved it. The floor tile looks just fine in bodyshop. Needs some fine tuning for shading and whatnot, but it's the four square seamlessly tiling floor tile I intended. When I copy it, paste it onto my 256x512 file, move it to the bottom portion, offset it, merge it down, save it, and open it in bodyshop it's a plain creamy brown wall with no tile pattern. I am totally stumped, but also quite sure I'm not the first person to experience this. Can someone please tell me what I'm doing wrong? Thank you. |
JLonier, can you please post a pic of the texture you're trying to use, and what you're getting in Homecrafter? My lack of coffee today is making that description of yours mae less sense than I'm sure it would to someone with a higher caffeine-to-brain ratio.
|
2 Attachment(s)
Surely, here we go. As you can see they're very simple.
EDIT: Well, I got it to work. I imported the floor via Homecrafter and then put it in edit so it would appear in the working directory. From there I shrunk it down to half it's size, copied, cut pasted etc... bottom line it was no longer a brown wall but a tiled brown wall. Also I ditched it for an overall smaller tile, added some shading and texture (you wouldn't believe how long it took to figure out how to do it) and it's come out quite nice. I'm trying a different pattern today. Onward! |
1 Attachment(s)
Some how I can't get my preview of my flooring to come out as clear as yours. It's the correct flooring, but it comes out too bright on the preview in Homecrafter. Is there a way to fix it?
|
on some sites you see a sort of mirroring floor how can you make that?
|
<iAMellieSWEETY>, I have no idea what would cause that. Are you starting by clicking the big plus rather than going from an existing floor?
TimSimser, there are no settings you can do to actual floor tiles to make them mirrored or reflective. For that you must place objects over the floor to either create a mirrored effect, or create a reflective effect on an existing floor. My favourite for that are the Murano Mobilia floors (available here which can be added to any floor to make it shiny. Just make sure you turn on reflections in your graphics options or they'll be flat black - and you have to have a really nice graphics card to run them at any decent framerate. |
thANK you thank you thankyou i wanted to learn all this ages ago but cudnt due to time great tutorial i only had a problem when the extensions got messed up bt i got it in the end thanx
|
I hope this hasn't been asked already, if so i missed it, sorry. When making another wall etc, do we place that one in the eagames/sims2/projects/homecrafter/walls folder? And every other wall we make?
I'm assuming the answer is yes but just want to double check. Great tutorial btw and Thankyou |
thanks for this tut! very helpful cause i know hardly anything about creating ._.; but this is a great one!
|
Thanks for the help.
|
thank you for this tutorial but i have a question
when i saved my walls and floor and ground as a .bmp none of them work. i am using paint net. and when i go to the home craft plue it says there was a problem creating a pattern with this .bmp please make surethat it is a valid .bmp snd try again? please can you help |
I'm having the same problem katatem17 is having. I will edit this post later if I can find a way to fix it.
Edit: I haven't found a way for it to show up in the bigger view, but if you import it to game, it should show up and work fine; you just have to go by the smaller view, until someone finds a way to fix it. |
| All times are GMT +1. The time now is 1:38 PM. |
Page 1 of 4
|
Powered by: vBulletin Version 3.0.14 · Copyright ©2000 - 2025, Jelsoft Enterprises Ltd.