#1

14th May 2013 at 4:38 AM
Last edited by werismyki : 11th Jul 2013 at
5:28 PM.
 Tutorial - Replacing Sim Painted Paintings
What You Will Need- Imaging Program
- S3PE
S3PE
What this tutorial will do
Show you how to replace images for Sim Painted Paintings
What this tutorial will not do
Teach you how to use
S3PE or Imaging Programs
Step by Step Instructions
The DDS files for the paintings are stored in FullBuild2.package in the base game installation directory - C:\Program Files (x86)\Electronic Arts\The Sims 3\GameData\Shared\Packages
1 - Double click on FullBuild2 or right click > Open and wait for
S3PE to open the file
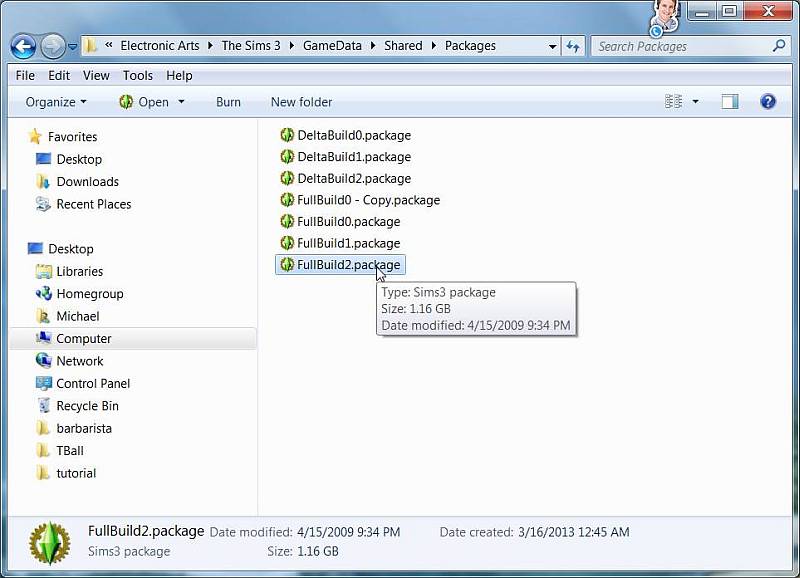
2 - Click on Names to sort
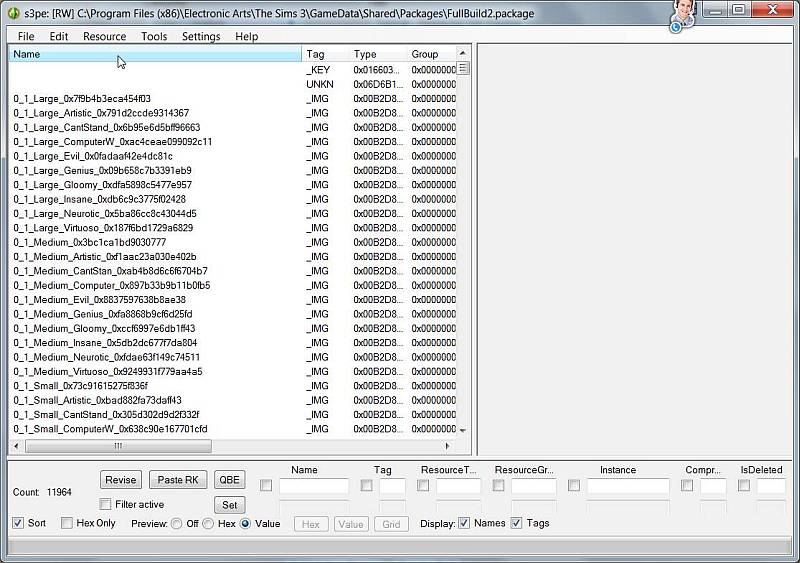
There are 158 default paintings
- 53 Small - Size: 256x128
- 57 Medium - Size: 256x256
- 48 Large - Size: 512x512
There are also trait variations for each default painting, default + trait variations = 1,580 paintings
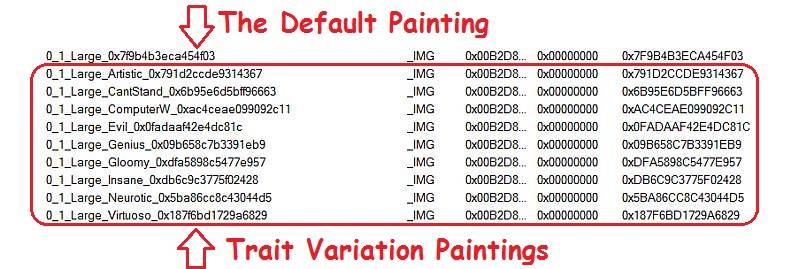
3 - You can export one file at a time or use CTRL + Left Click to select multiple files
4 - Right click on the painting and select Export > To File
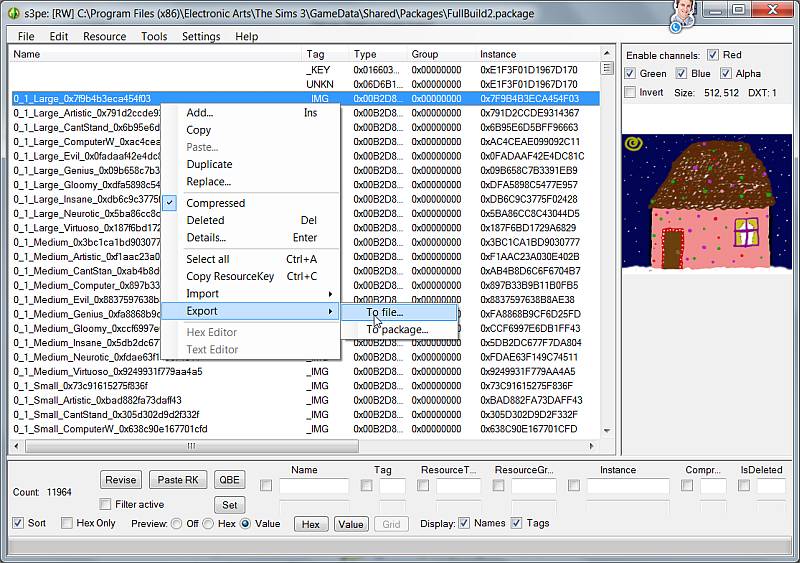
5 - Export the DDS file(s) you wish to replace to a folder on your desktop, The folder can be named whatever you want. Once you have all the DDS files you want to replace, move on to the next step.
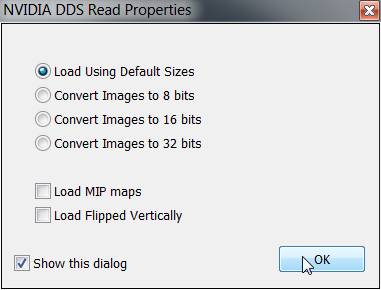
6 - Open one of the DDS files in your image program, I'm using PhotoShop. When the file opens in PhotoShop it will ask you to verify settings: Use "Load using default sizes" and make sure "Load MIP Maps" is unchecked.
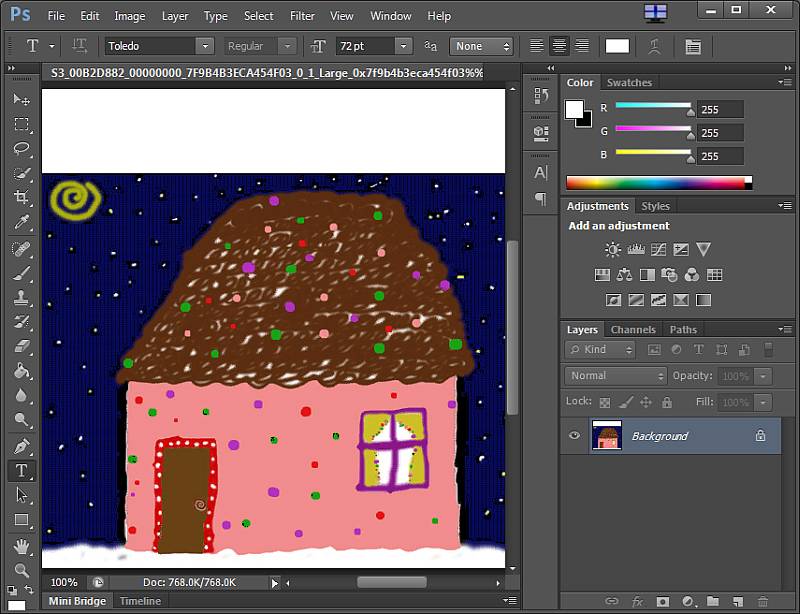
7 - Once the file is loaded in your Image Program, notice the painting does not take up the whole area. You must make your new image fit over the original painting.
8 - Find an image that you want to use as a replacement. This could be a screenshot from the game, your own artwork, a real life picture of you, or whatever you want. Open it in your image program.
9 - Use the Selection Tool to select your new image or with the Selection Tool selected click on CTRL + A
10 - From the Top Menu, click on Edit > Copy or use CTRL + C
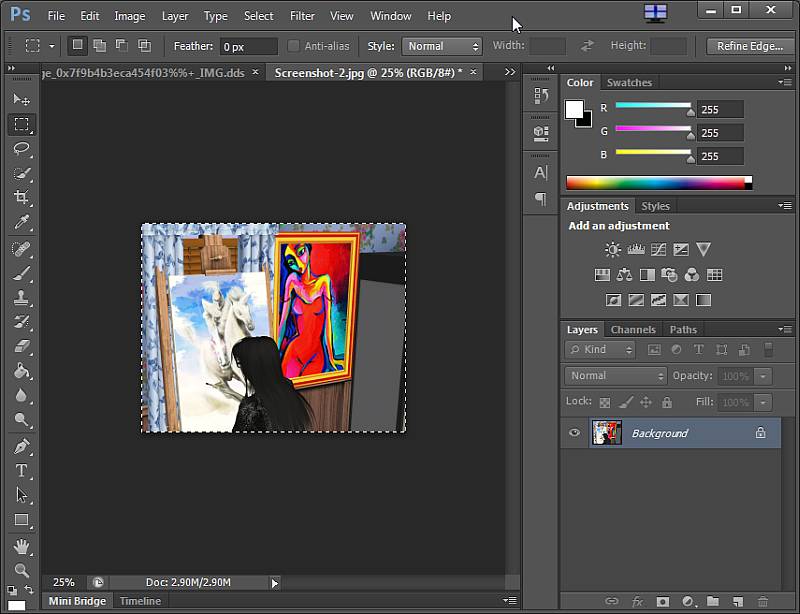
11 - Switch to the painting image and from the Menu, select Edit > Paste or CTRL + V.
12 - Chances are your new image will be larger than the painting, so you will need to resize your image to fit over the painting. In some cases, once you have resized, you will also need to crop the new image to fit over the painting.
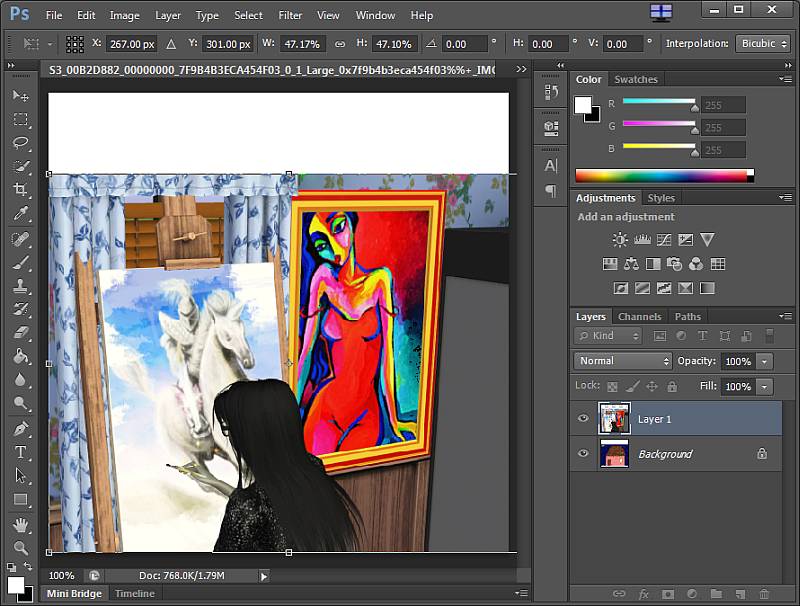
13 - Once you have your new painting placed over the original properly, merge all layers or flatten the image.
14 - Now you are ready to save your new painting, From the Menu, click on File > Save or CTRL + S. You should now see the screen below. Save with the following settings compression: DXT5 or DXT1 depending on the file. You can find the compression the original uses by looking at the DDS in a hex editor or by clicking the auto hex box in Project S3PI when extracting. format: default and check generate mipmaps.
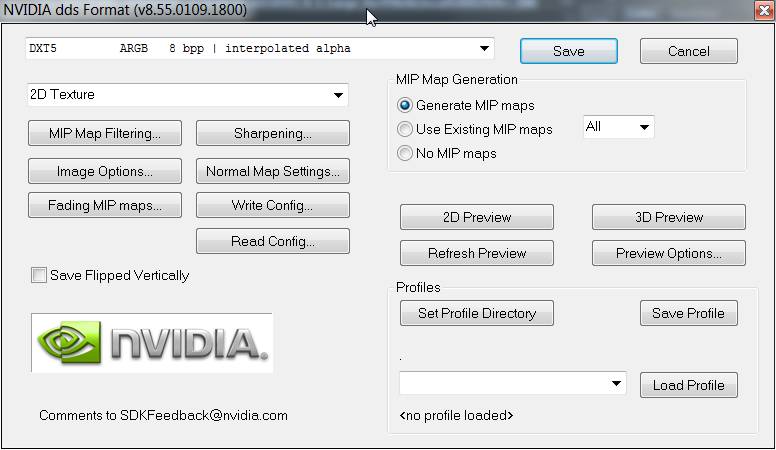
You will need to do this for each of the DDS files you wish to replace. Once you have finished replacing all the DDS files, you'll need to get them into a package.
15 - Open
S3PE 16 - From the Menu, click on File > New or CTRL + N
17 - From the Menu, click on Resource > Import > From File or CTRL + SHIFT + M
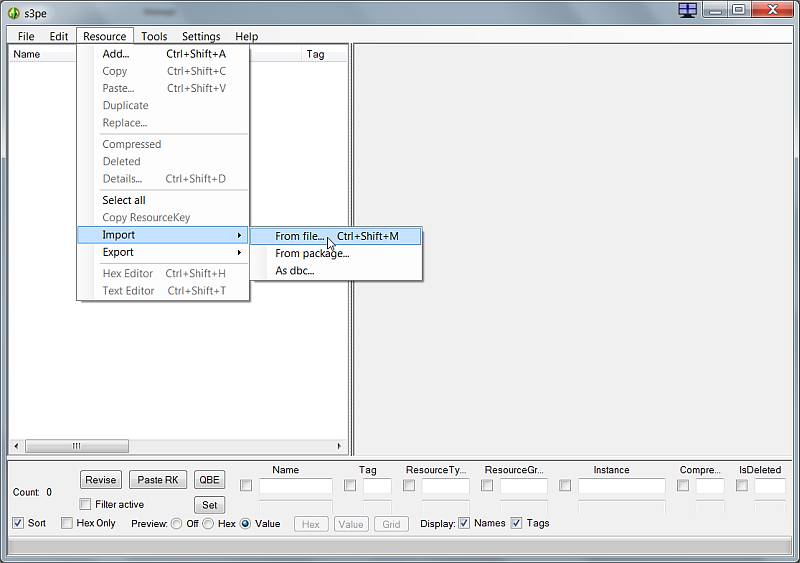
18 - Select the DDS file(s) that you just finished replacing and click on the "Open" button
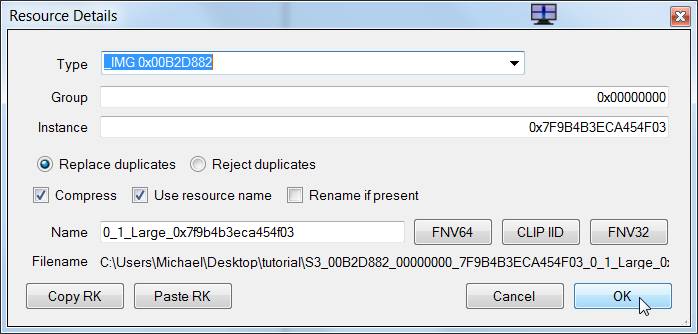
19 - You will see the window below, just click on the "OK" button
20 - From the Menu, click on File > Save or CTRL + S, give the package a name
21 - Place the new package in your Mods\Packages folder and test your new paintings.
That's pretty much all there is to it. Once you actually do this, it will be rather simple and not nearly as long as it looks here in the tutorial. It's your choice how many or how few of the paintings you wish to replace, afterall it's your game.
If you wish to ADD more paintings instead of replacing them, then see the
Adding More Paintings to Sim Painted Paintings Tutorial
---------
 14th May 2013 at 4:38 AM
Last edited by werismyki : 11th Jul 2013 at 5:28 PM.
 17th May 2013 at 6:36 PM
 17th May 2013 at 8:58 PM
 18th May 2013 at 7:02 AM
 19th May 2013 at 7:06 AM
 20th May 2013 at 8:19 PM
 9th Jun 2013 at 5:01 AM
 11th Jul 2013 at 6:01 PM

 Sign in to Mod The Sims
