For this tutorial, I'll be using:
-SimPE
-MilkShape 3D
-PaintShop Pro. *This tutorial will not show how meshing works. Chances are, if you are looking at a tutorial about tips & trick for creating wallmasks, you already created your windows and/or doors meshes. *
(But it will surely show you stuff you already know, I am like that, I give more than you need...)
What's better than an ingame wall to create the perfect wallmask?
So first thing first, go grab a wall mesh. Nah..not the actual wall tool, but the dormer mesh
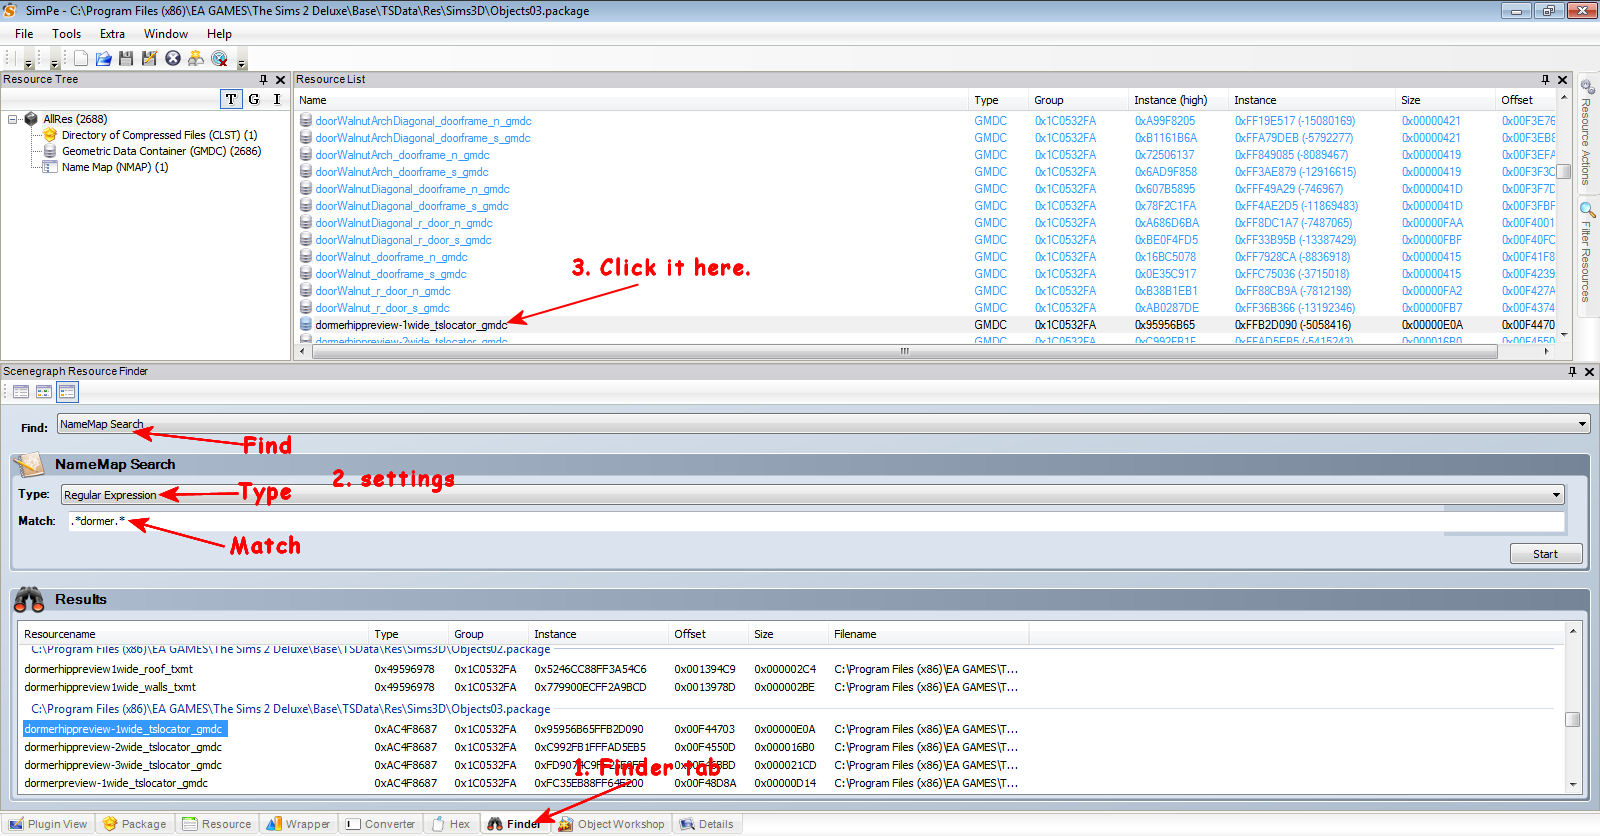
Open SimPE, and go to the Finder tab.
Setting as follow : Find = NameMap Search Type= Regular Expression Match= .*whatever you're looking for.* In this case dormer.
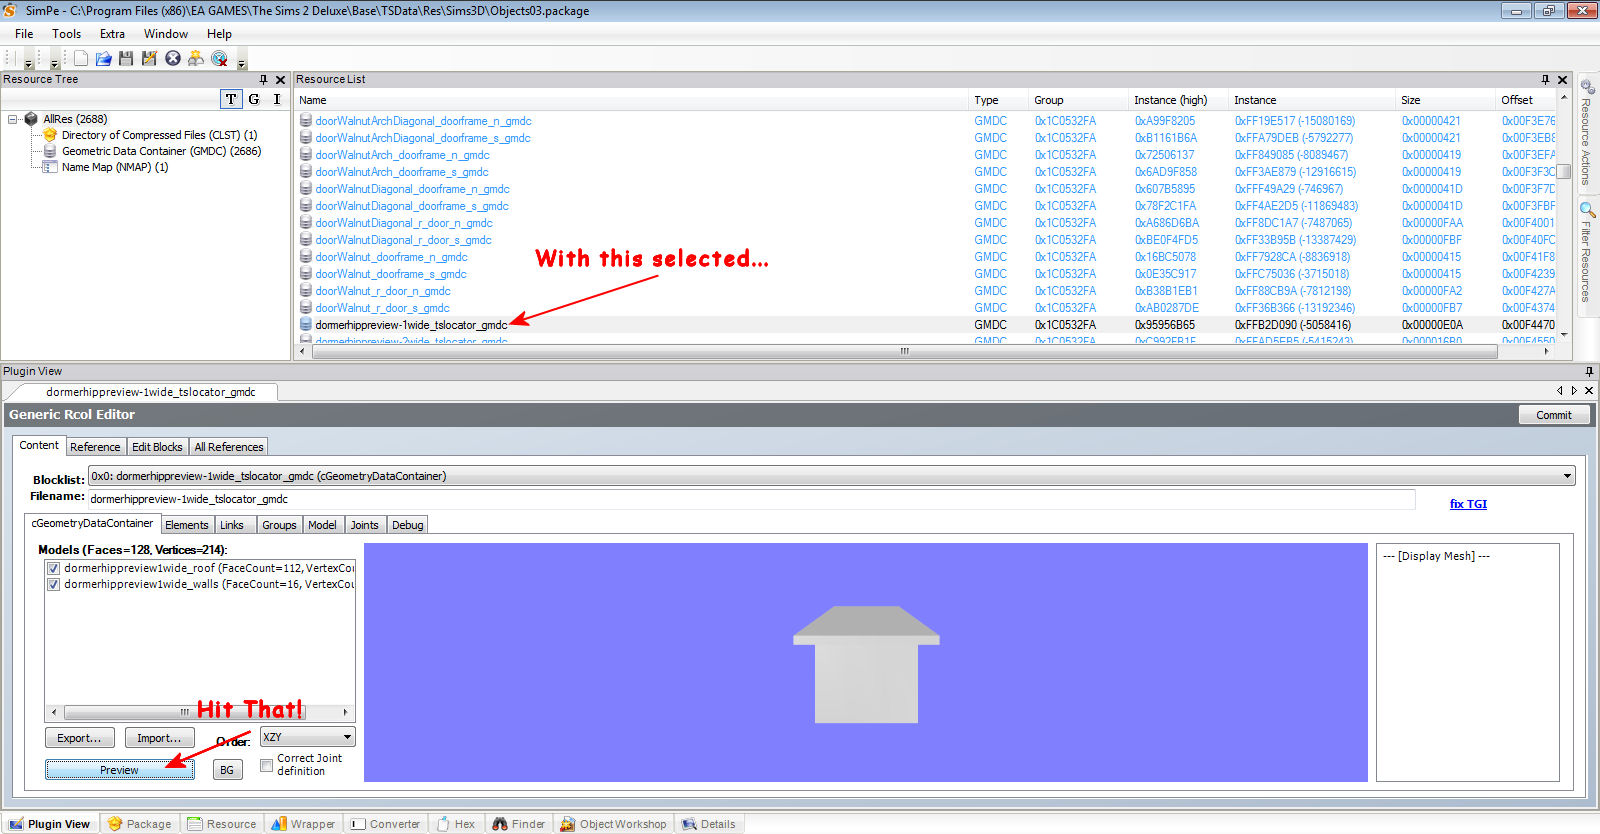
Now hit Start. Let the program load everything, it might take a while. Once done, scroll down until you find dormerhippreview-1wide_tslocator_gmdc. Double click on it and give it time, it will appear highlighted in your Resource List window.
Click on that highlighted gmdc and hit Plugin View... Hit preview.
here you have it...autenthic walls...you even get a roof! woah.
* Note, you could also choose the other gmdc : dormerpreview-1wide_tslocator_gmdc instead, it has the other roof on it.
But for this tutorial, I'll use the hipped roof one.
You will want to export this as an .obj, so go ahead and click Export, just above Preview. Export it into a folder of your choice, I name my folder Dormers.
Do not rename it, so you know this one is the Original.
You will also need a texture to apply on it, believe me..it does help.
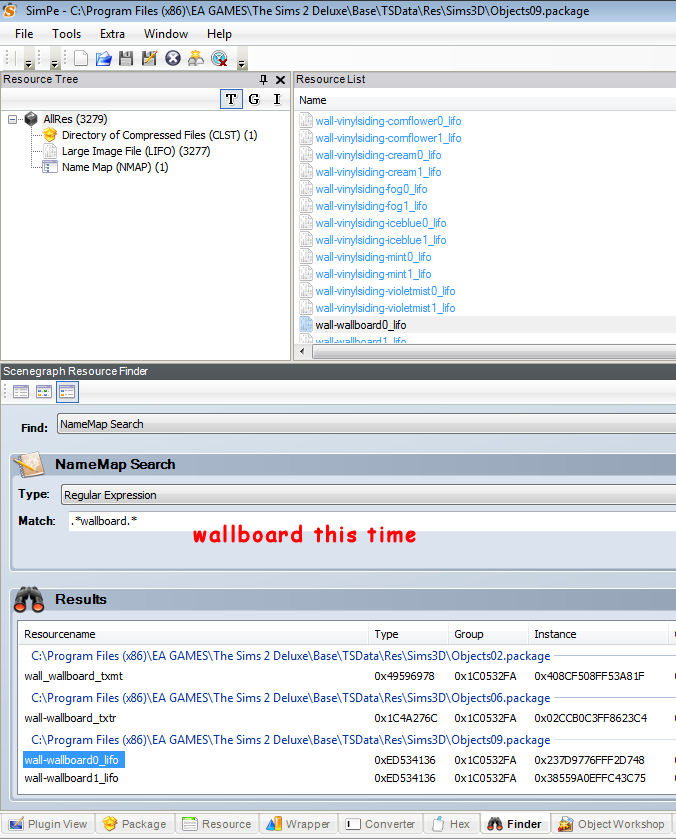
Go back on Finder tab, and this time, in the Match field, enter:
.*wallboard.*
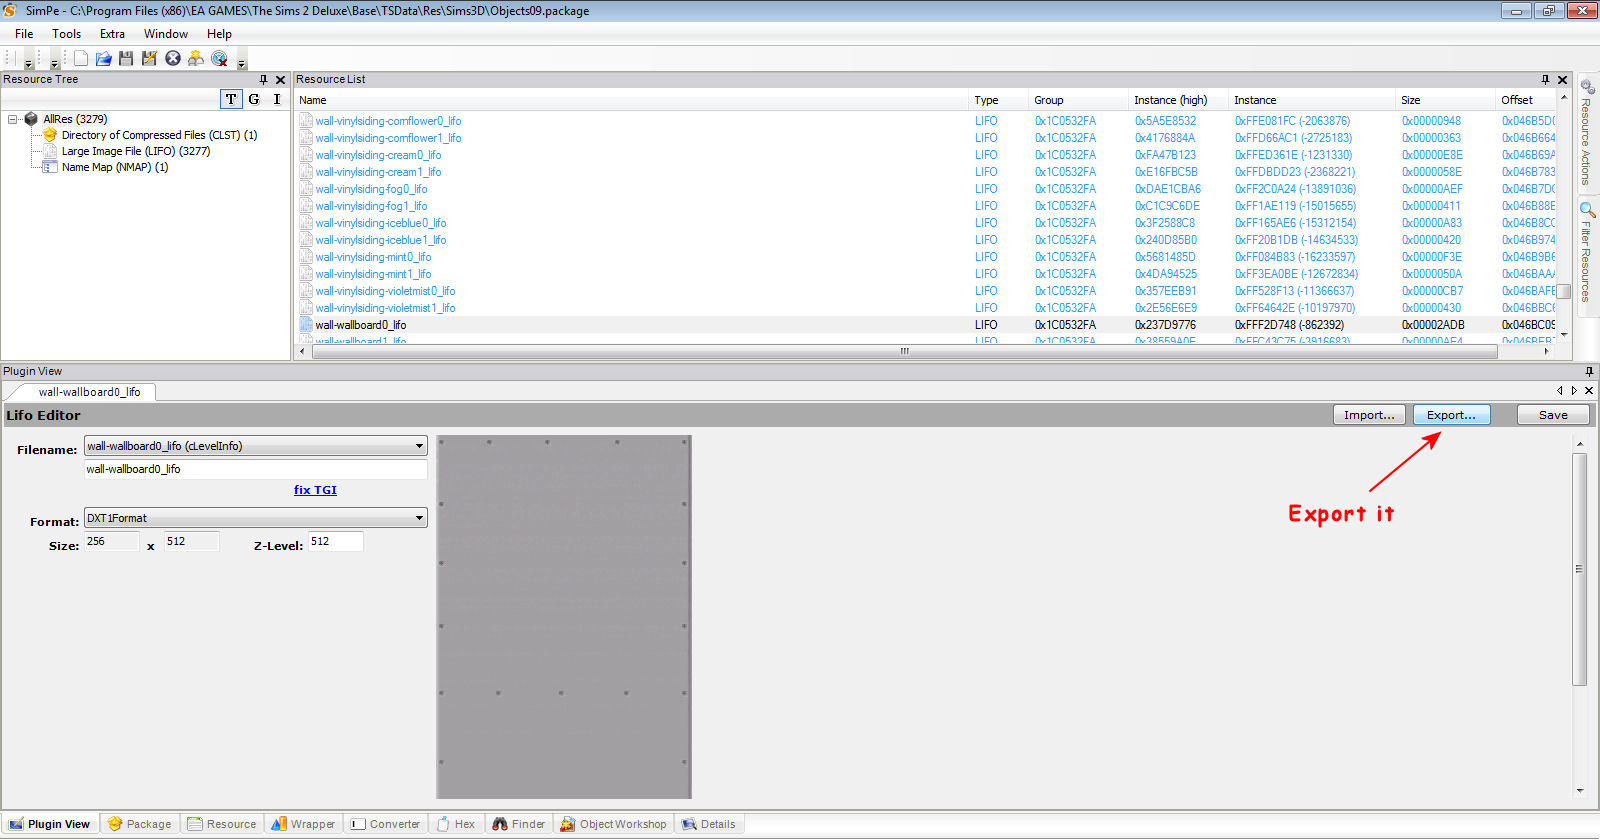
You want the 0_lifo one as it is the biggest. So double click on wall_wallboard0_lifo, then click on it in your Resource List, hit Plugin View...and then Export it to your new folder.
You have everything you need to work with now, SimPE part is done. You can close it.
Onto the MilkShape part now.
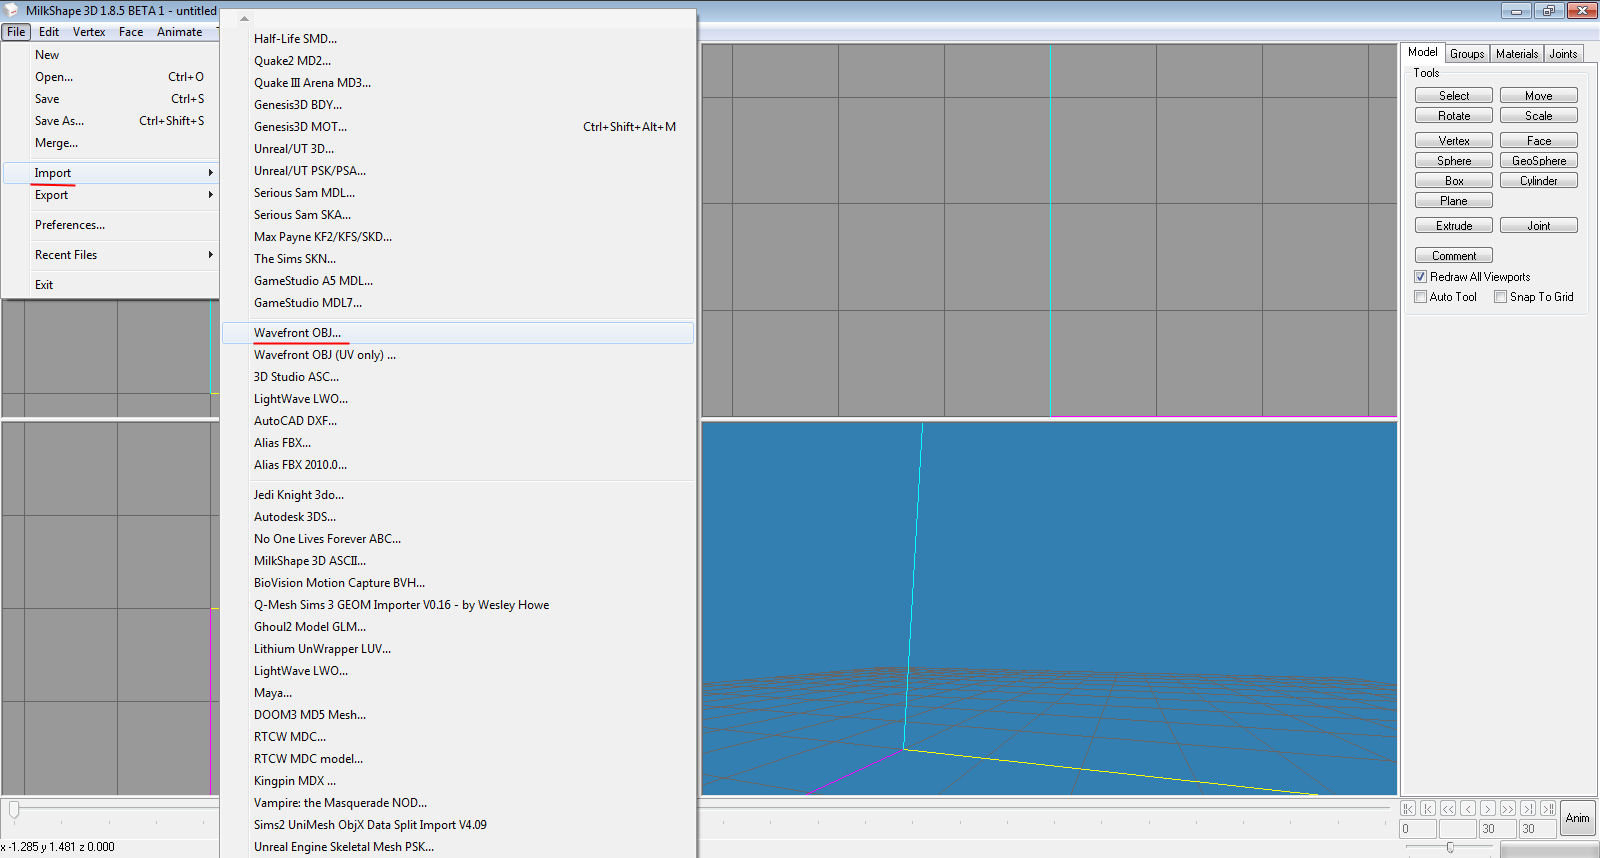
Open MilkShape 3D, and import your new .obj.
Under Groub tab, you'll find 2 groups, the roof and the walls. You can delete the roof group, you won't need it to help with wall masks.
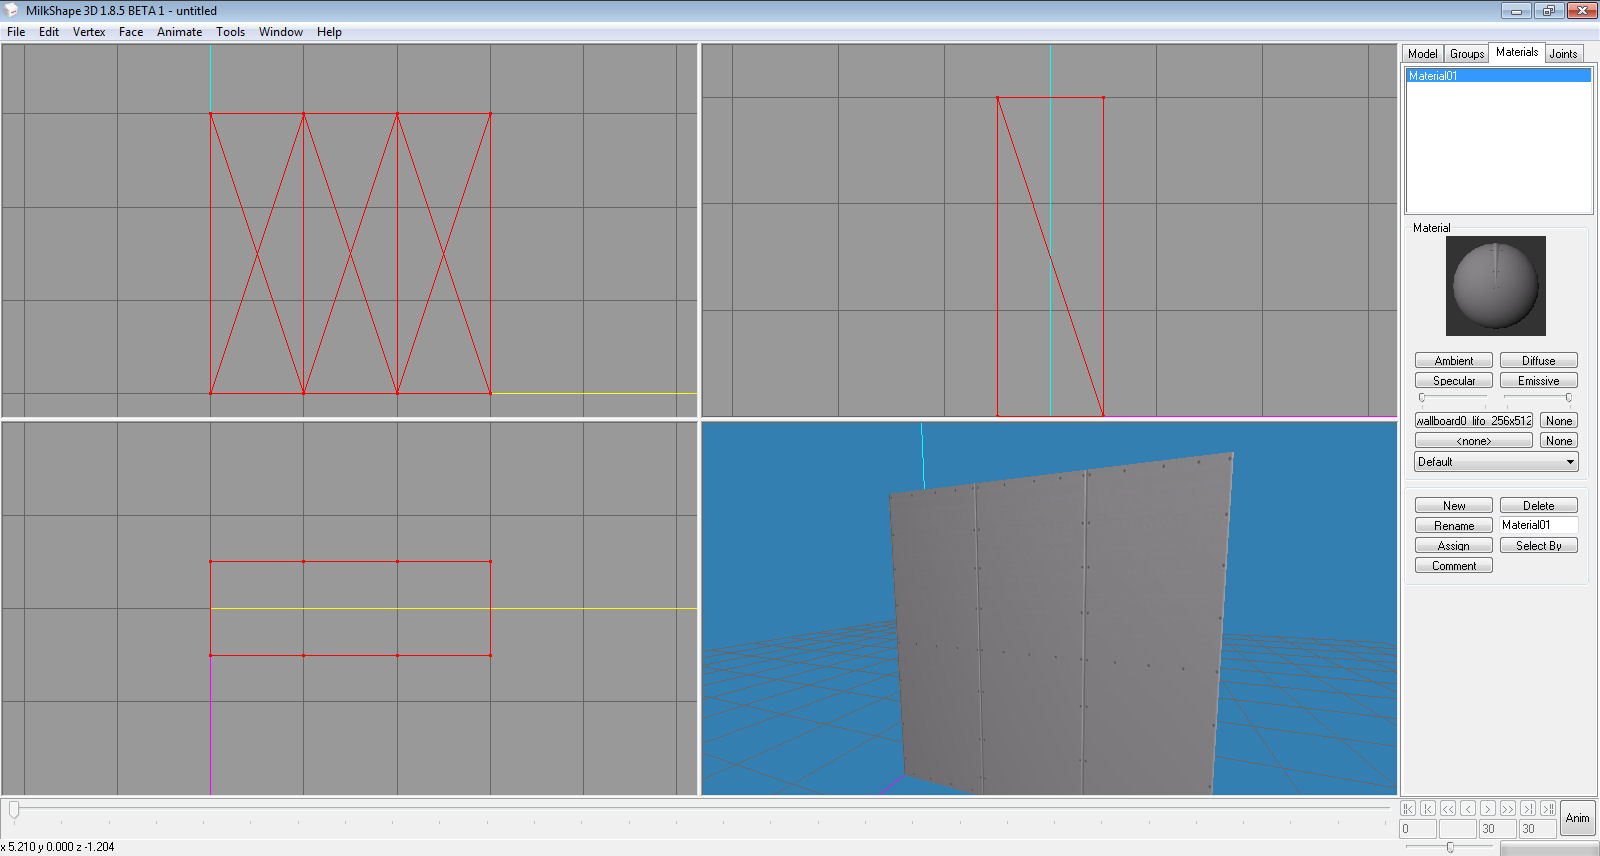
Select your walls group and assign the wallboard texture you exported.
Look at that....how neat!
You got yourself a 3 X 1 wall box. As you can see, the wall texture applies perfectly on it, because..this is how dormer previews are done.
Just like real walls. No UV map needed.
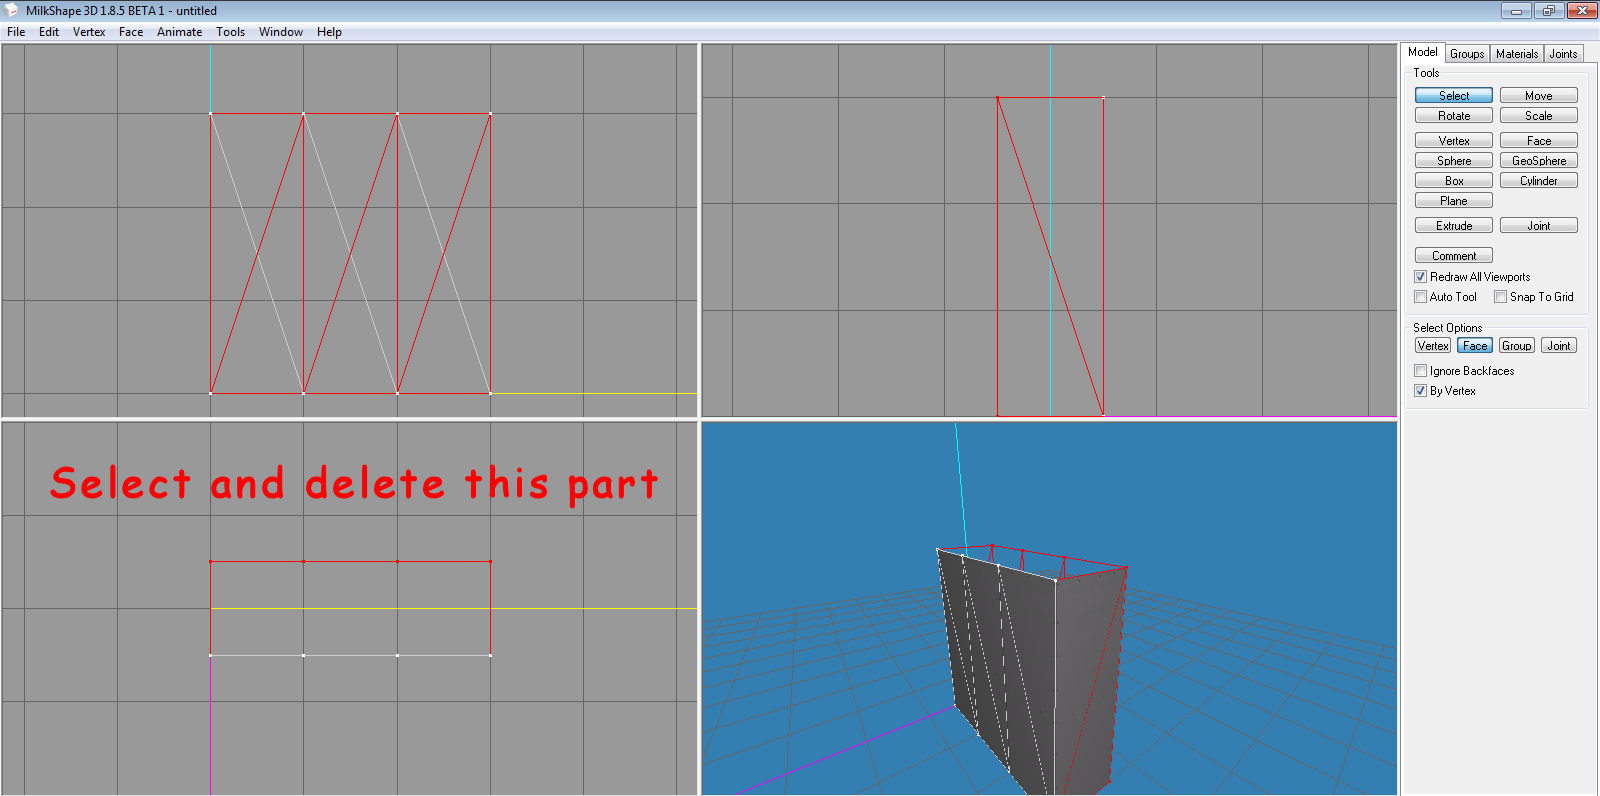
For wall masks creation, you will want to keep only the 3 wall panels in front. No need the back, no need the sides.
So go ahead, and delete these parts.
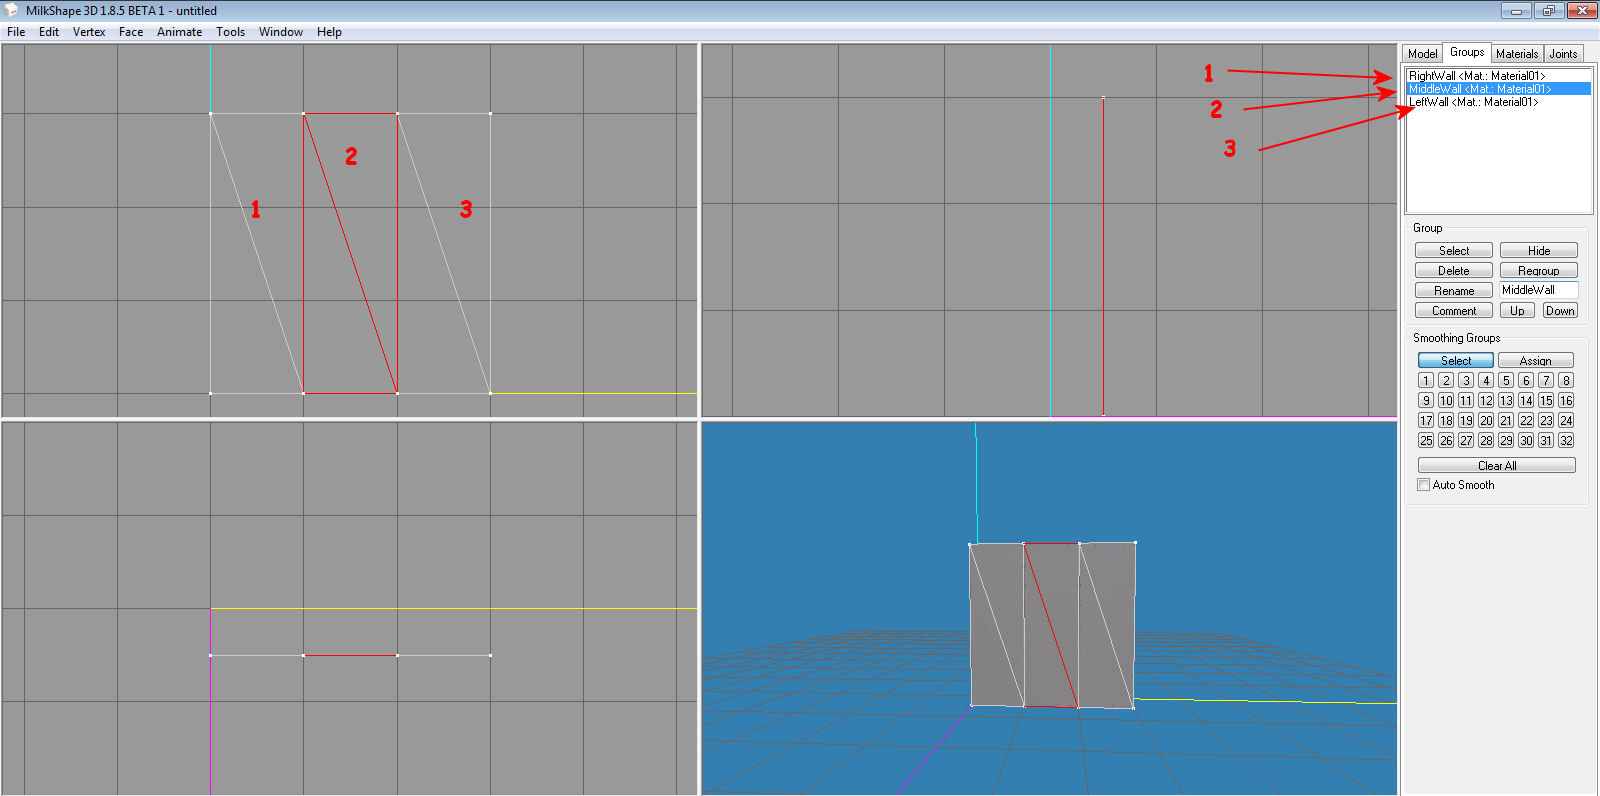
You are now left with a *3 walls* section. It would be a good time to regroup each section into...RightWall, MiddleWall, LeftWall.
Or as you wish, wall1, wall2 and wall3.
Given the way this mesh is mapped, it is easy to select each section individually, and make 3 different groups.
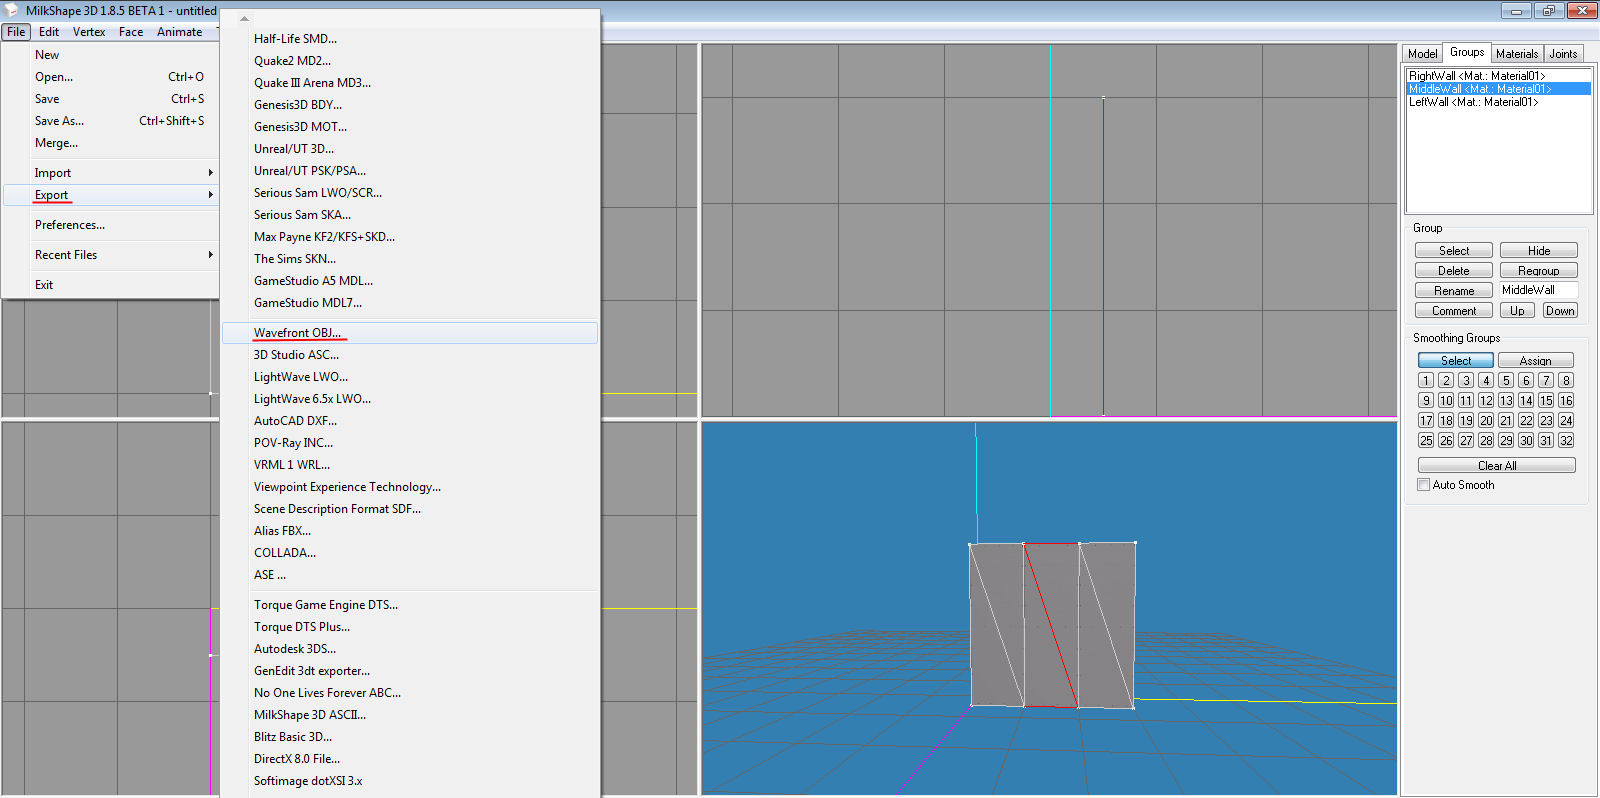
Now Export your new beauty, File/Export/Wavefront OBJ.
This time, give it a new name.
Here you go, your WallTemplate is done!
You'll never need to do these steps again. Every time you'll need to create a new wallmask, you'll have your obj Template ready.
Creating your actual Wallmask Image.
In MilkShape, select File/New. Don't save when asked.
This program does not like it when we import a Sims2 Unimesh over an .obj. But it completely tolerates the opposite.
This is why we choose New.
I am sure your new window frames are all done and ready, so let's import your North one...Or your South one..it does not matter.
For this tutorial, I'll use my North frame.
I am making a double tile window for this tutorial, but this will work with a one tile, and even with a 3 tiles window...your new Template is a 3 walls section
In its group tab you'll want to hide the glass mesh, and the wallshadow/southwallshadow mesh.
Assign your textures to the other groups, that will help you greatly.
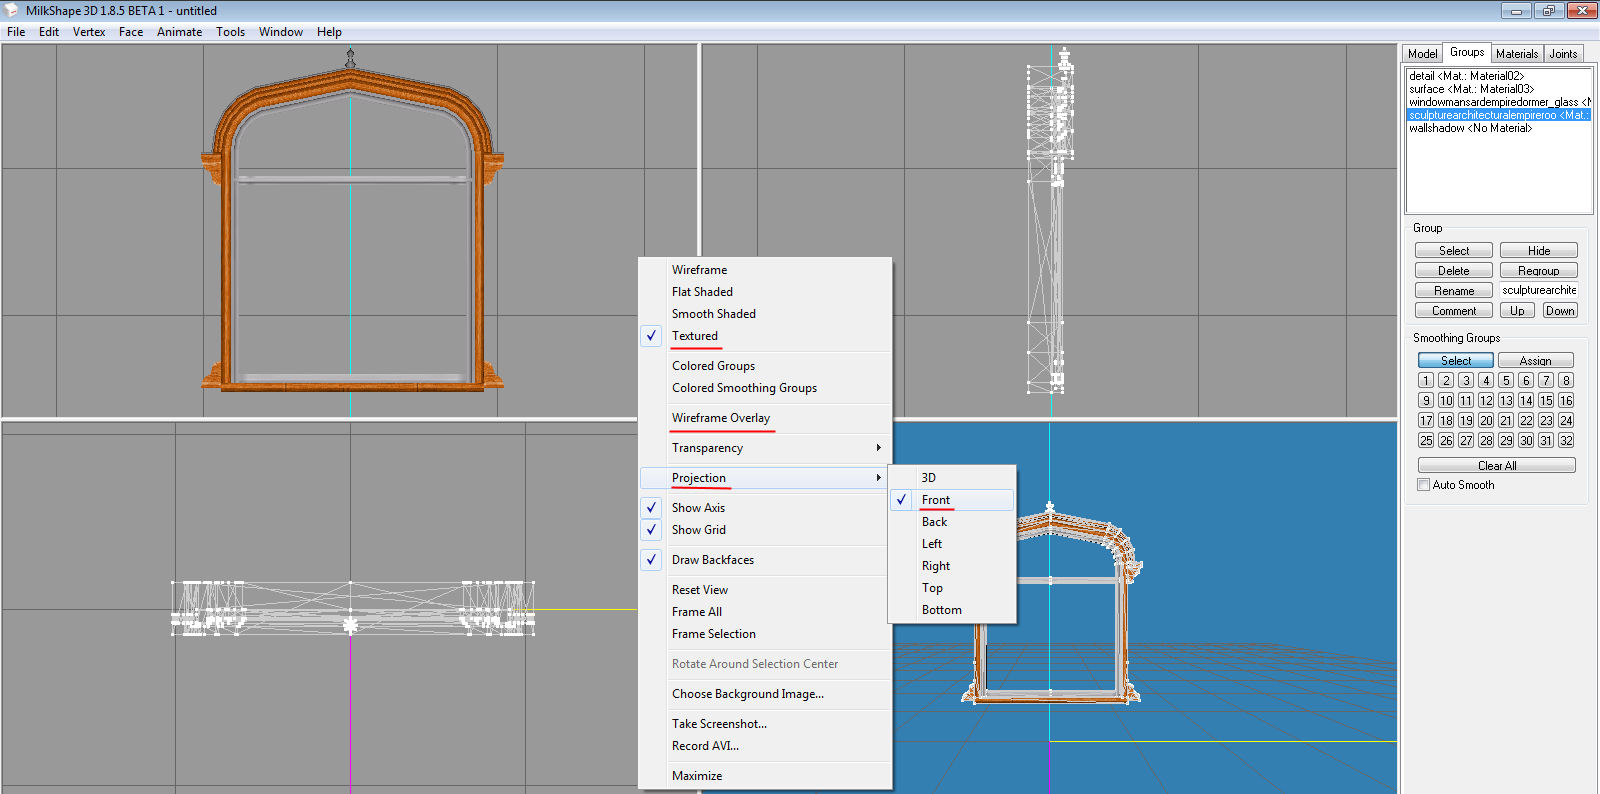
In the top left quadrant, make sure that the Projection reflects your frame's direction.
My North frame is the front of my window, so I choose Front, by right clicking in that top left quadrant.
Also, make sure that Textured is selected instead of Wireframe. You need to see this quadrant in color.
You can also get rid of the Wireframe Overlay, if you wish.
Once you are done with setting up your Nframe, go ahead and import (wavefront obj) your new wall template, and assign its wallboard texture to it.
(it might already be assigned)
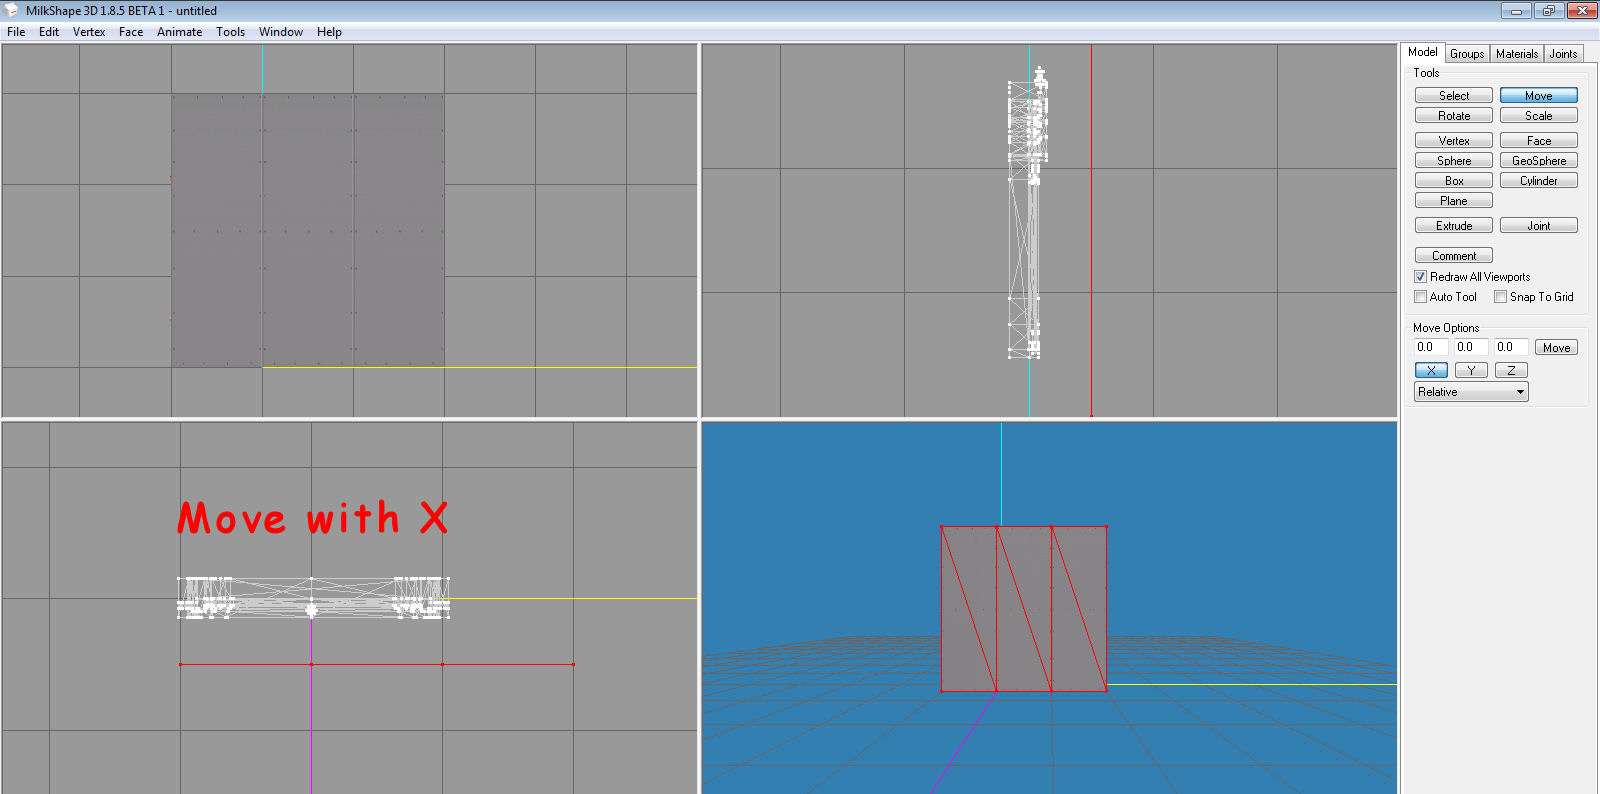
You will need to move your wall to fit your window position.
This is easy. We know that a double window sits in the middle of 2 walls. So find the middle of your frame, and move the wall there.
Select all 3 wall groups, and with Move selected, move them using the X axis until both middle match.
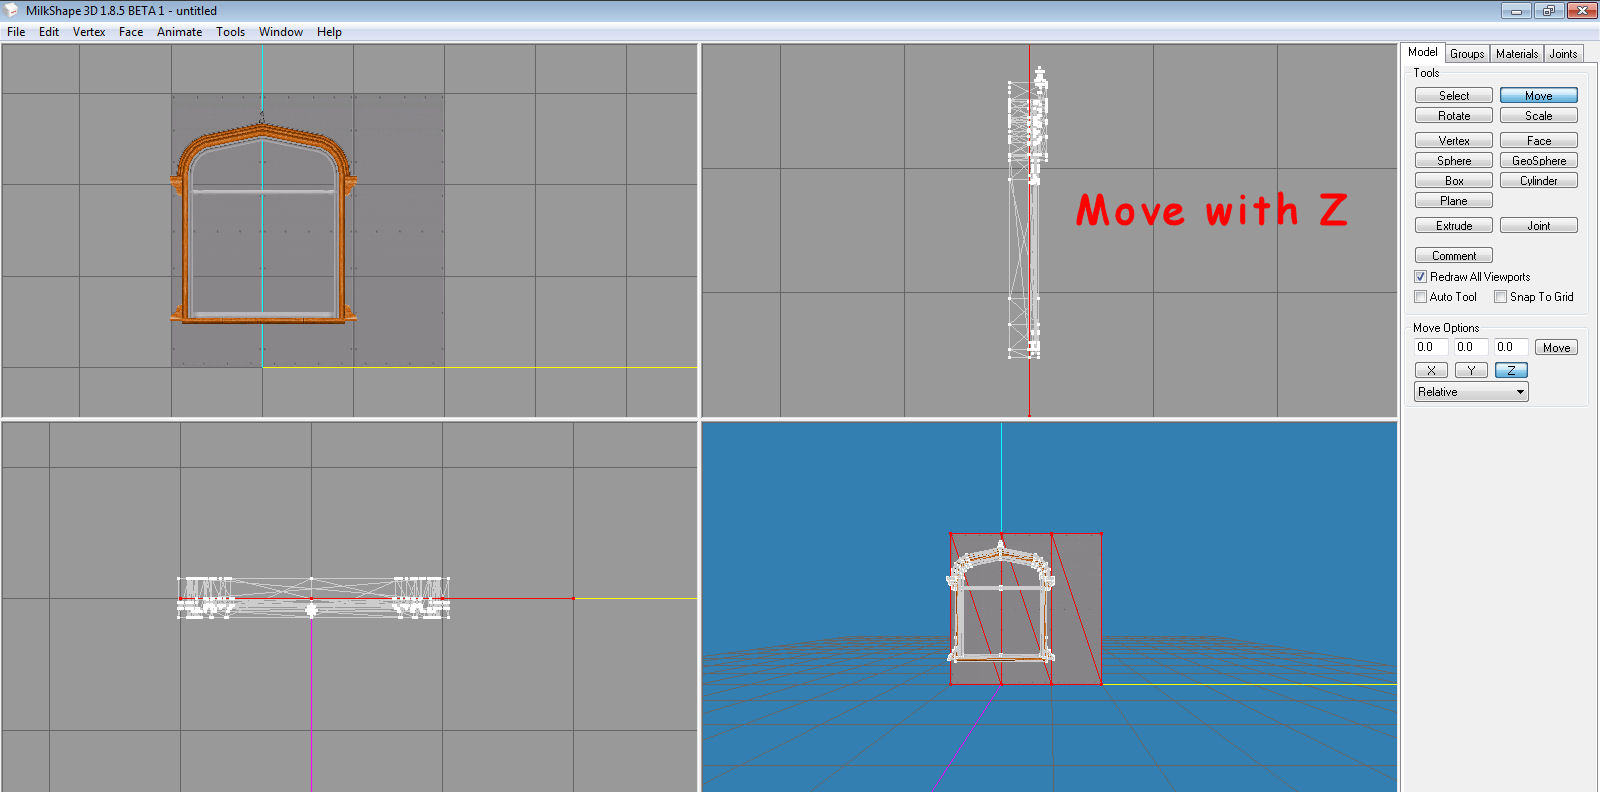
Then move it again using Z this time, to better place it behind your frame.
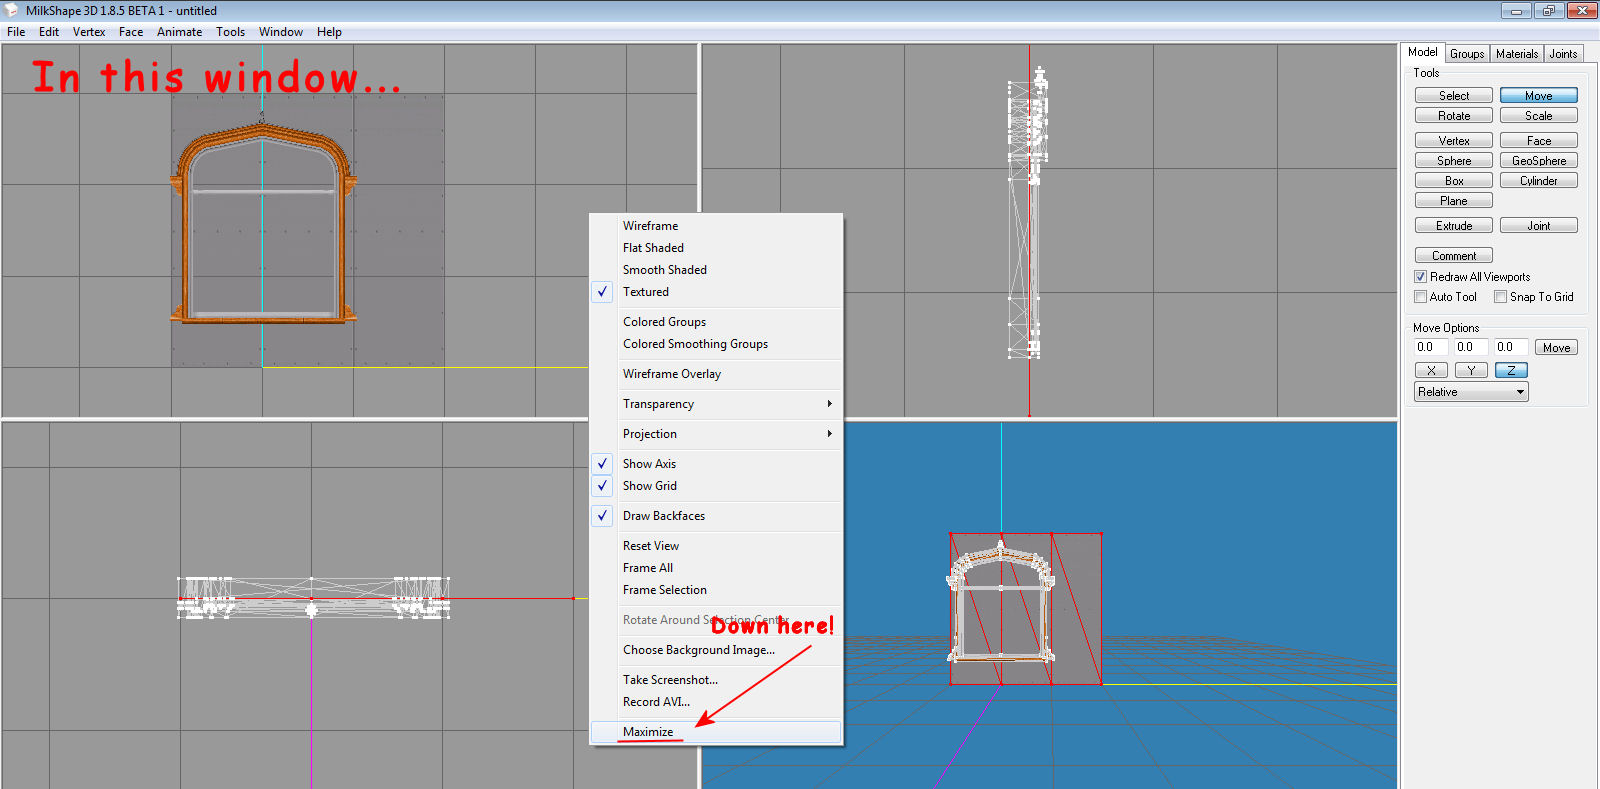
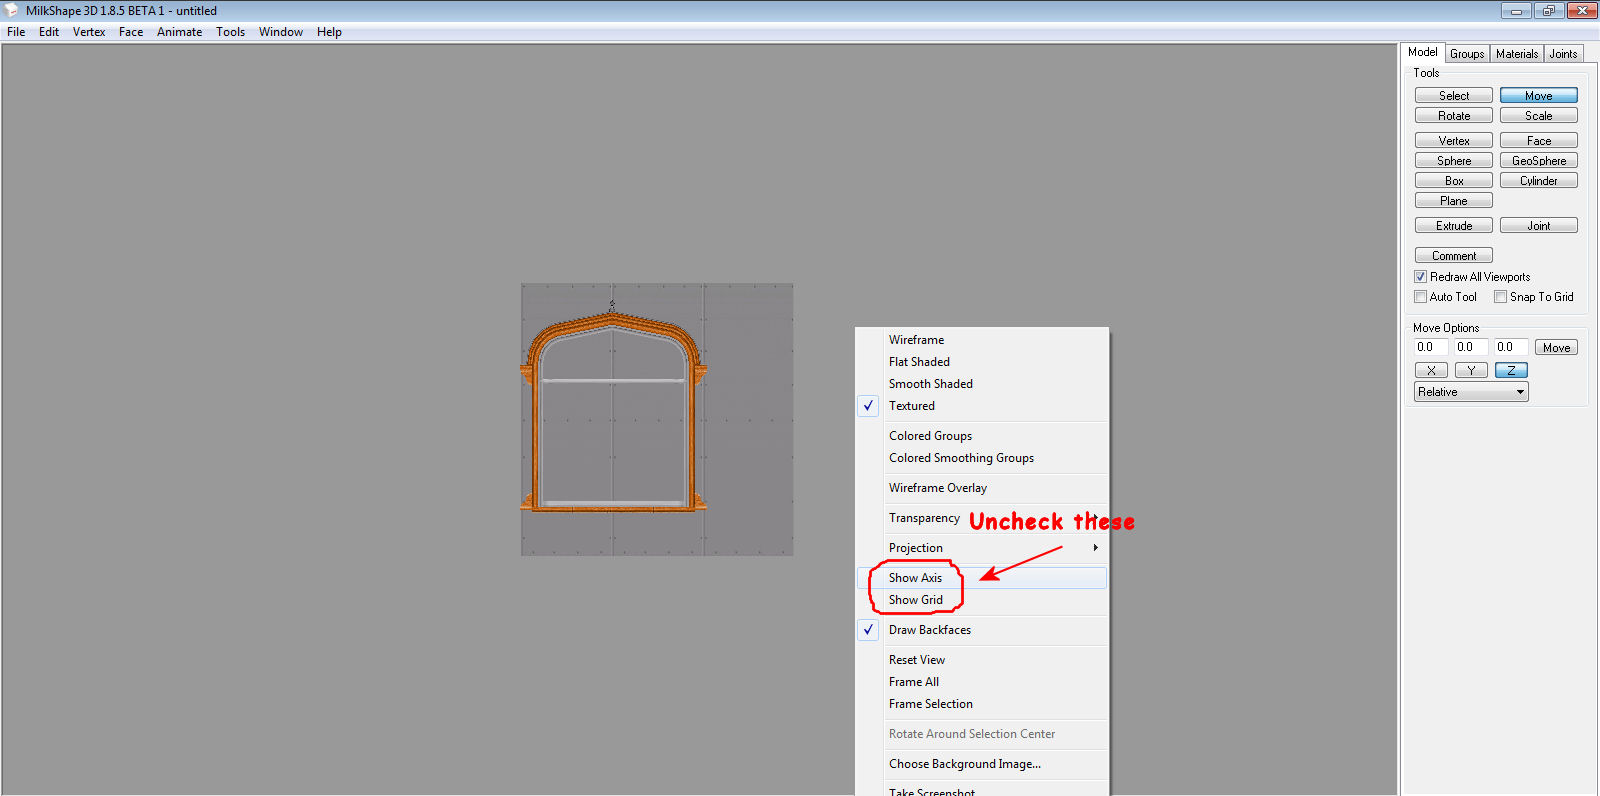
Every thing is in place, now right click in that top left window and change the view to Maximize.
Also get rid of Show Axis and Show Grid
Take a Screen shot! use print screen...
Onto the PaintShop Pro part...
The only part of this image you want to keep is one wall panel which contains one half of your window.
If you are making a one tile window, your whole window frame is contained in that wall panel.
And if you are creating a 3 tiles window, well...you'll need to crop keeping all 3 walls.
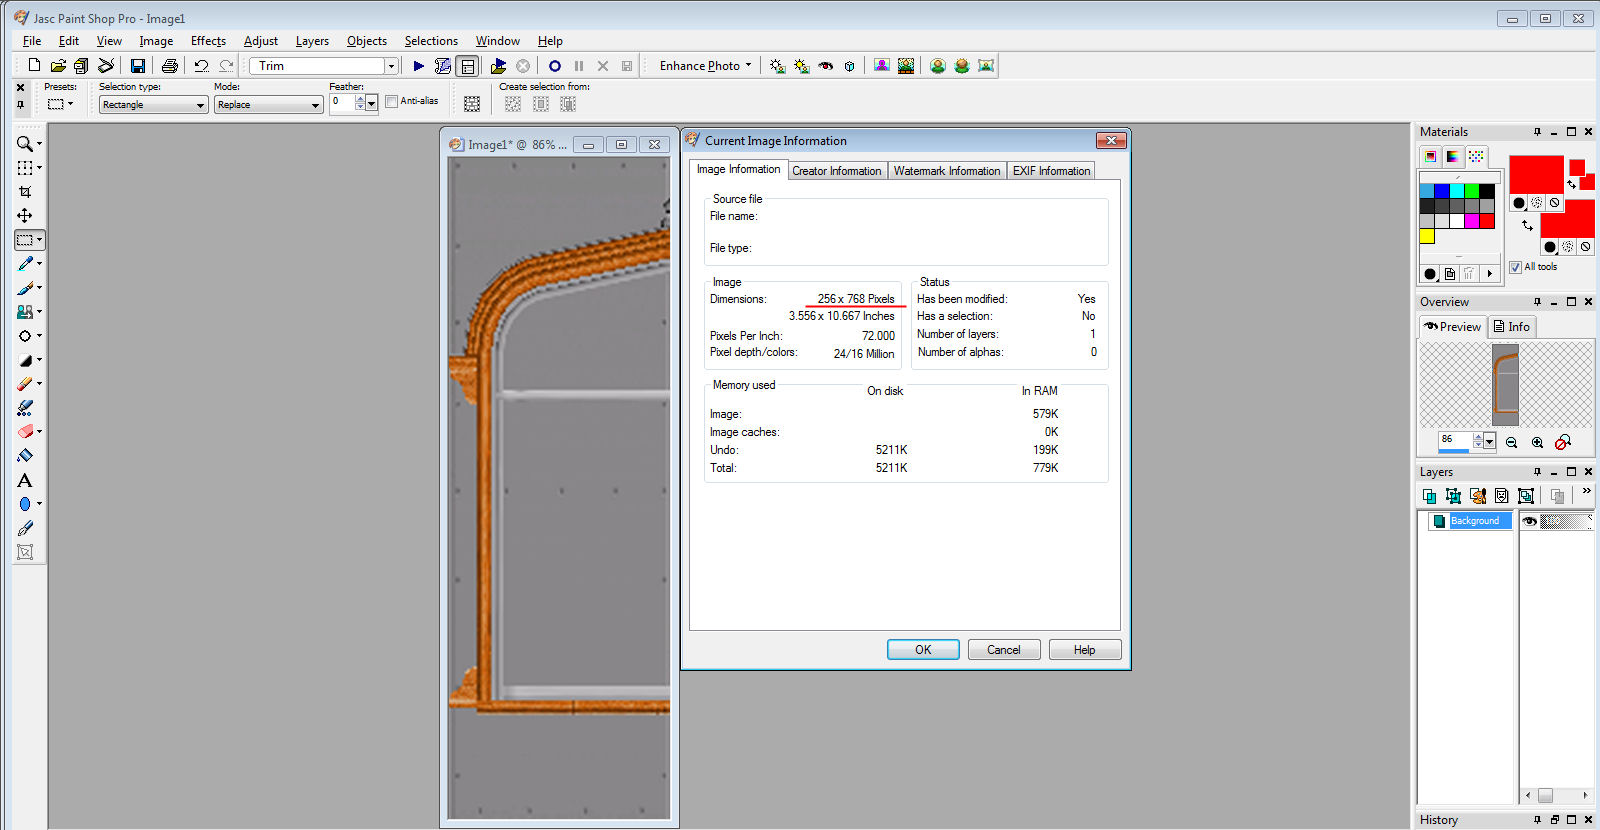
So go ahead and select only what you need, then crop to selection.
Once you cropped your new image, resize it to : 256 X 768.
This is the dimension of a wall.
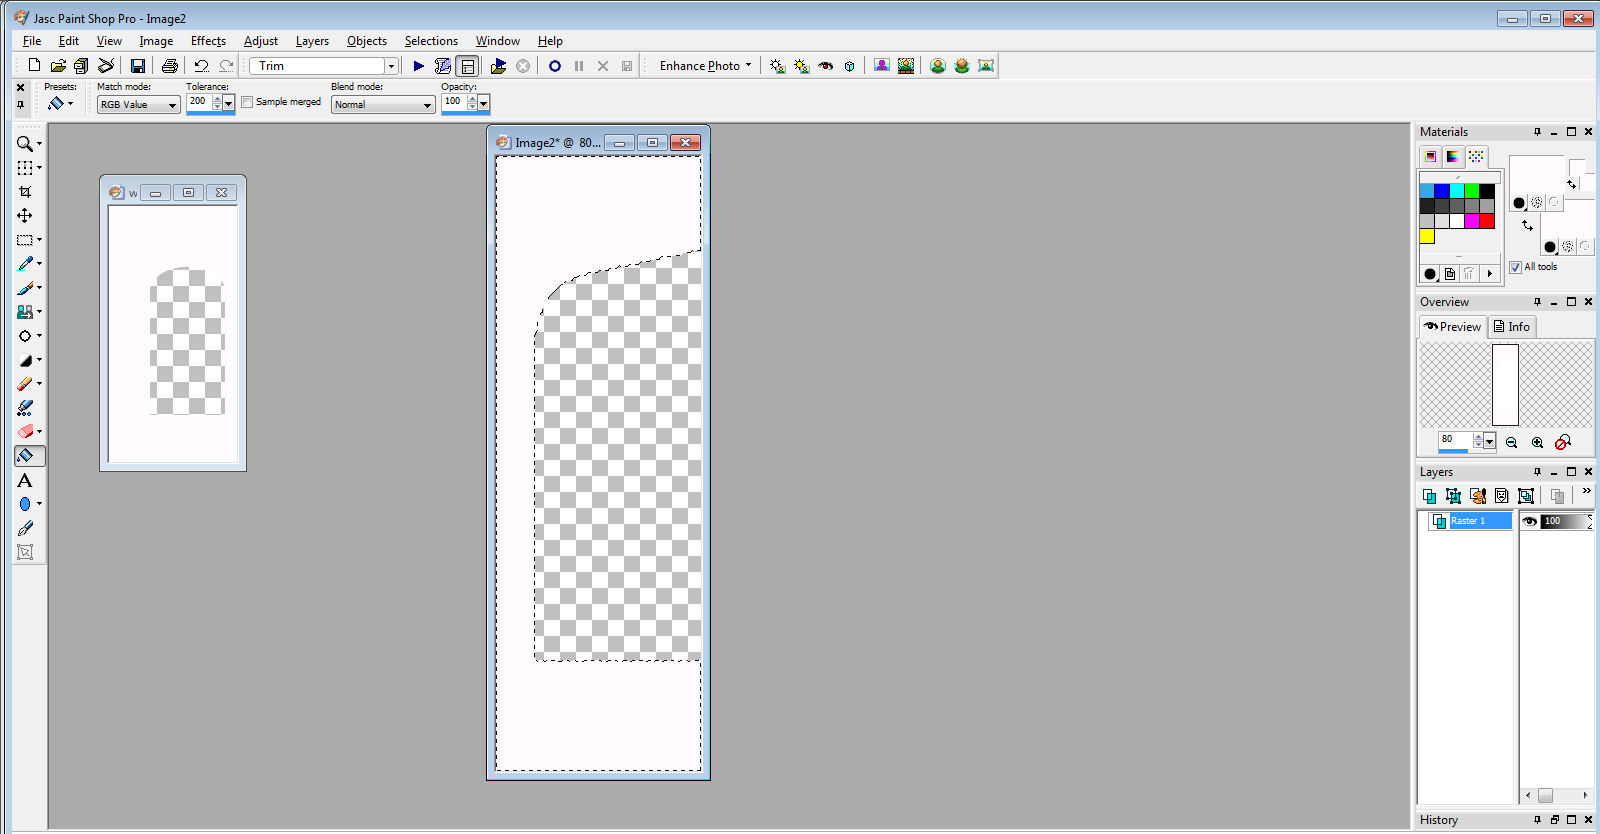
In PaintShop Pro, I need to copy this image and paste it as a new one, to be able to delete from it, and make that deleted part transparent.
Maybe this is not needed with Photoshop.
So I have my new image. You will now select the inside of your window, and delete that part.
Then, you will select Invert..and fill it with white. You can open the original EA wallmask, so you get the proper white to fill yours with.
Tada!!!!
But you are not done yet.
You will want to resize it again, this time, to fit the original image of your new window. Mine was 128 X 256.
You will notice that your new wallmask image got squished, and this is exactly what you want.
You have one side wallmask done!
If you were making a one tile window, you are done.
Now copy this new image, and mirror it.
Both sides wallmasks done!
If you are making a 3 tiles window, proceed the same way, but this time, crop an image of each of the 3 wall panels.
You'll have 3 wallmasks.
Save all your new wallmask images as .png.
Test them in MilkShape!
Select one wall group at a time and assign one wallmask. Then select another wall group and assign the other wallmask...
Isn't it beautiful?
You will want to fool proof in game, but it looks like something that'd fit huh?, and took you one shot.
BONUS!!!
More info for you, that you probably figured out already...
Now that you have the wallboard texture, nothing stops you from making a CC wall covering with it.
Just make sure it does not cost 0!
Otherwise, it will do no better than no wall covering at all, as it will bring down the room score environment.
Unless you really like to work for nothing, give it a price.
This probably already been done, but not by YOU!
The wall template can be quite useful for other projects as well.
Import it whenever you need....
-The wall height in game?
-The wall width in game...?
-Is my new picture frame centered?
-Does my new wall paper texture looks good..?(before even loading HomeCrafterPlus)
-Etc.
I hope this little tutorial helped you.
Feel free to ask any questions about it.
Je mange des girafes et je parle aussi français !...surtout :0)
Find all my old MTS Uploads, on my SFS, And all new uploads Here . :)
 Sign in to Mod The Sims
 15th Feb 2018 at 6:56 PM
 Hit preview.